How to convert a PDF to Google Slides

You can display PDFs as-is by sharing your new Chromebook’s screen with your audience, but scrolling through pages isn’t engaging. With a little touch-up in Google Slides, you can make a great presentation out of a PDF file. This step-by-step guide shows you how to convert a PDF to Google Slides to keep your audience engaged.
Google Slides: Perfect for collaborative presentations
With Google Slides, part of Google’s free online office suite, creating and sharing presentations has never been easier. You can access it anywhere through a web browser, Android and iOS mobile apps, or a ChromeOS desktop.
Thanks to its compatibility with Microsoft PowerPoint, it’s one of the best presentation tools. Moreover, every edit is recorded in a detailed revision history, so you and your team can work on presentations simultaneously. Each editor has its own colors and cursors, plus a permissions system to make teamwork easier.
The benefits of choosing Google Slides over PDFs for Presentations
While PDFs are popular for their ease of shareability and compact nature, they can be limiting for presentations. Google Slides offers a compelling way to present projects with engaging visuals and annotations.
What’s more, PDFs hinder real-time teamwork on crucial projects, whether in business or academia. Google Slides solves this, allowing access and collaboration from any device, anywhere, as long as you’re connected to your Google account.

The best Google Slides templates for work, school, and home
Slide into success with one of these beautiful templates for business, personal, and school use
Converting PDF to PowerPoint for Google Slides
Since Google Slides doesn’t support inserting a PDF, you must convert your PDF file to a PowerPoint file. This may change the formatting, but you can adjust the PowerPoint file as needed.
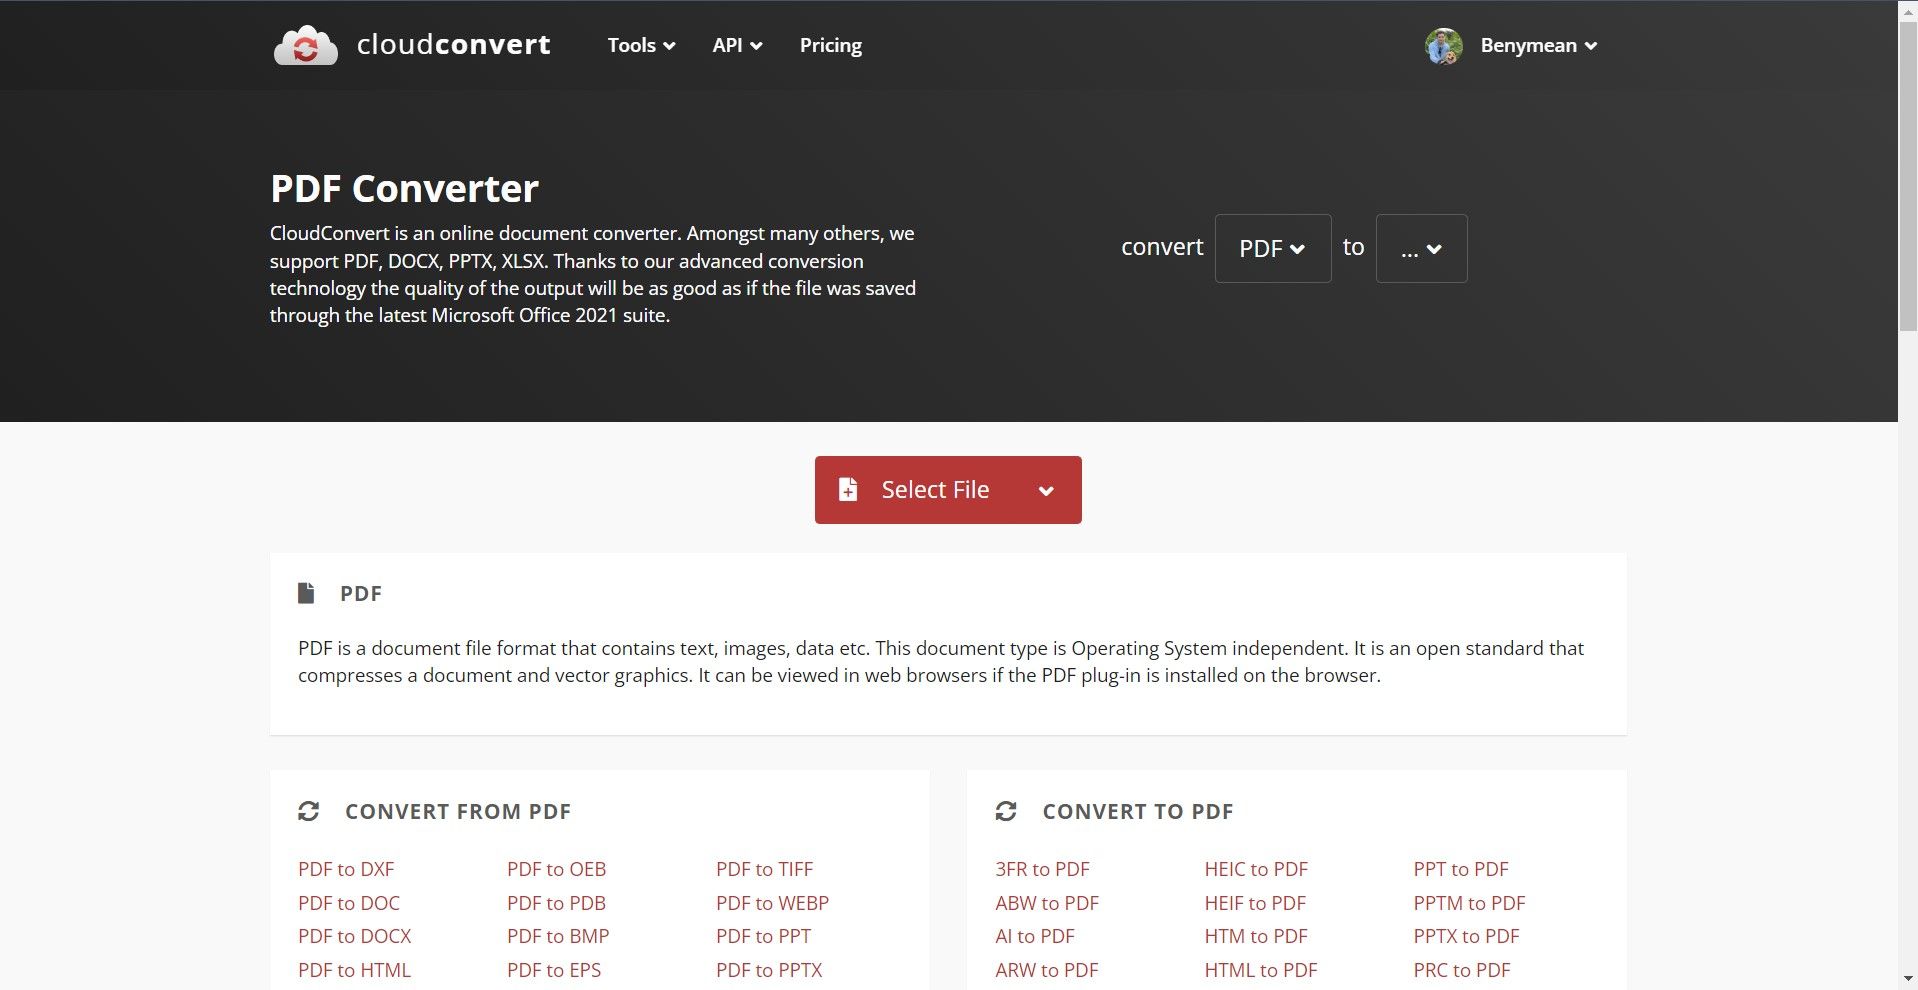
You can use several tools, such as PDFelement for Windows or Mac. Many online website tools like ILovePDF and CloudConvert convert files without installing an app. For demonstration purposes, we use CloudConvert.
- Visit the CloudConvert website at cloudconvert.com.
- Click Select File in the homepage’s center to upload your document.

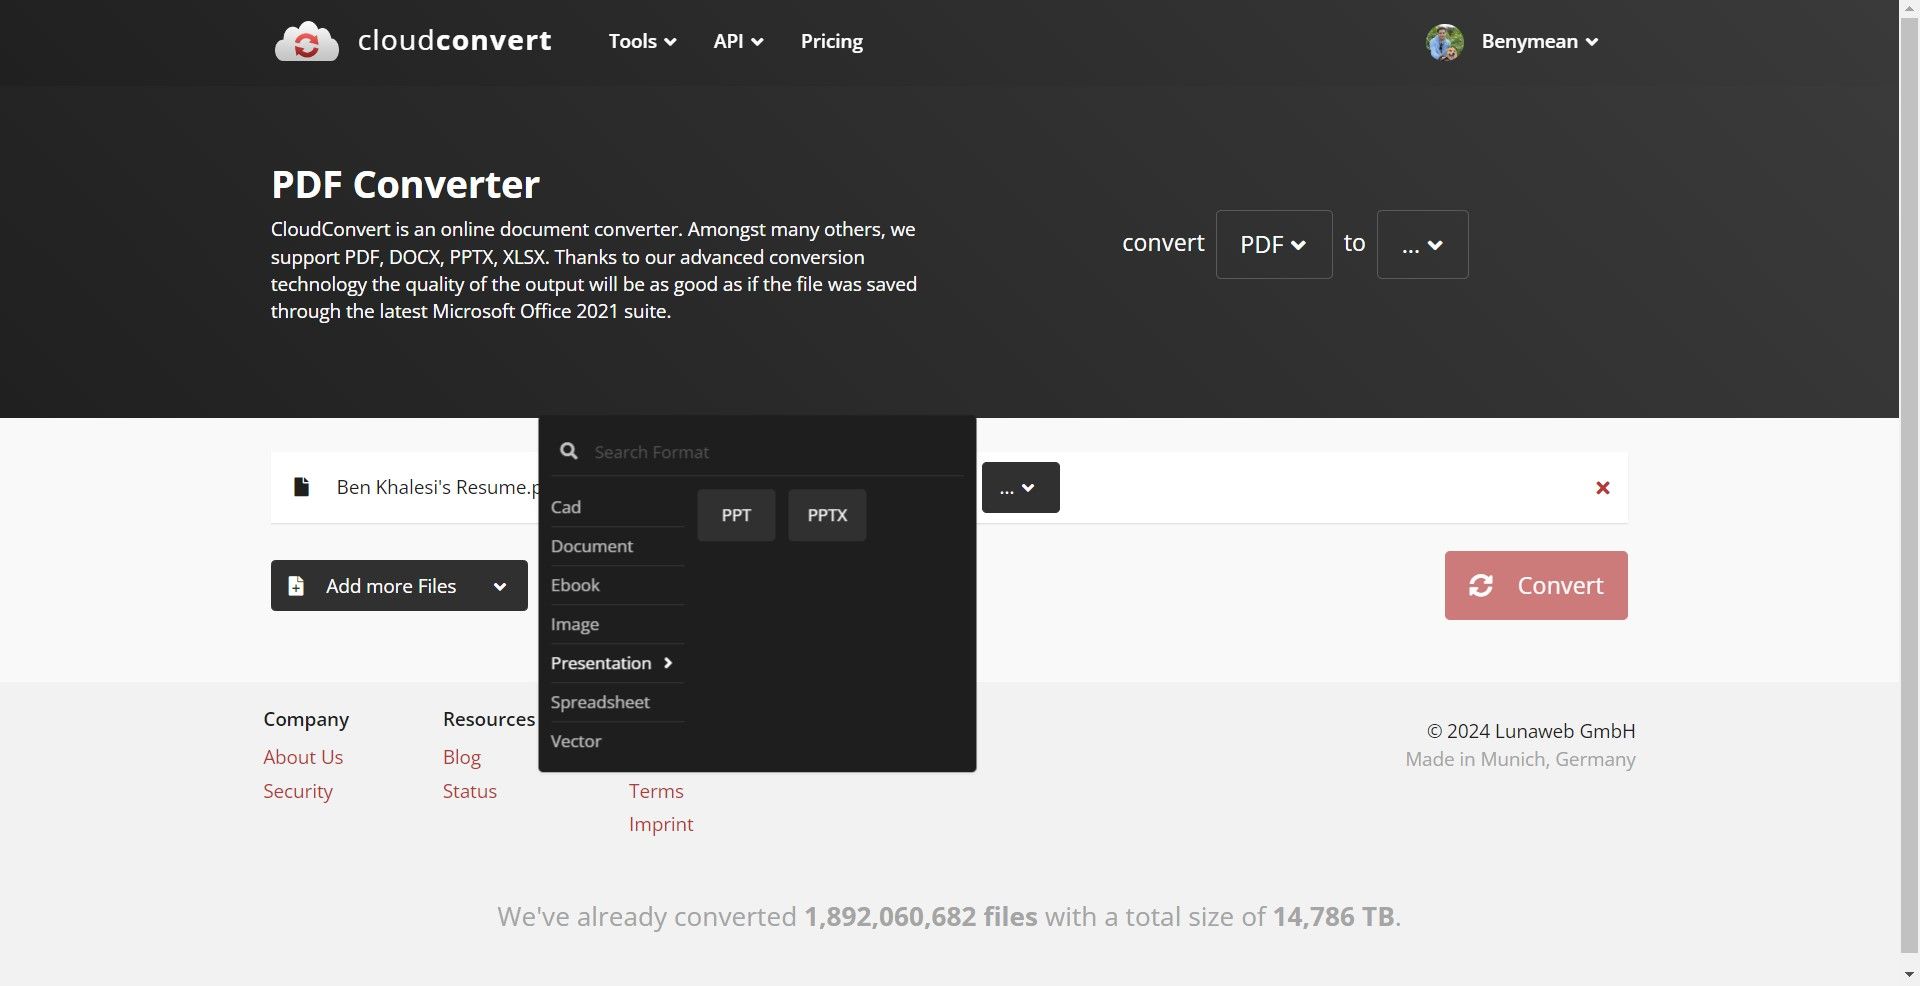
- Go to the Presentation menu, select PDF as the input format, and select PPT or PPTX as the output format.
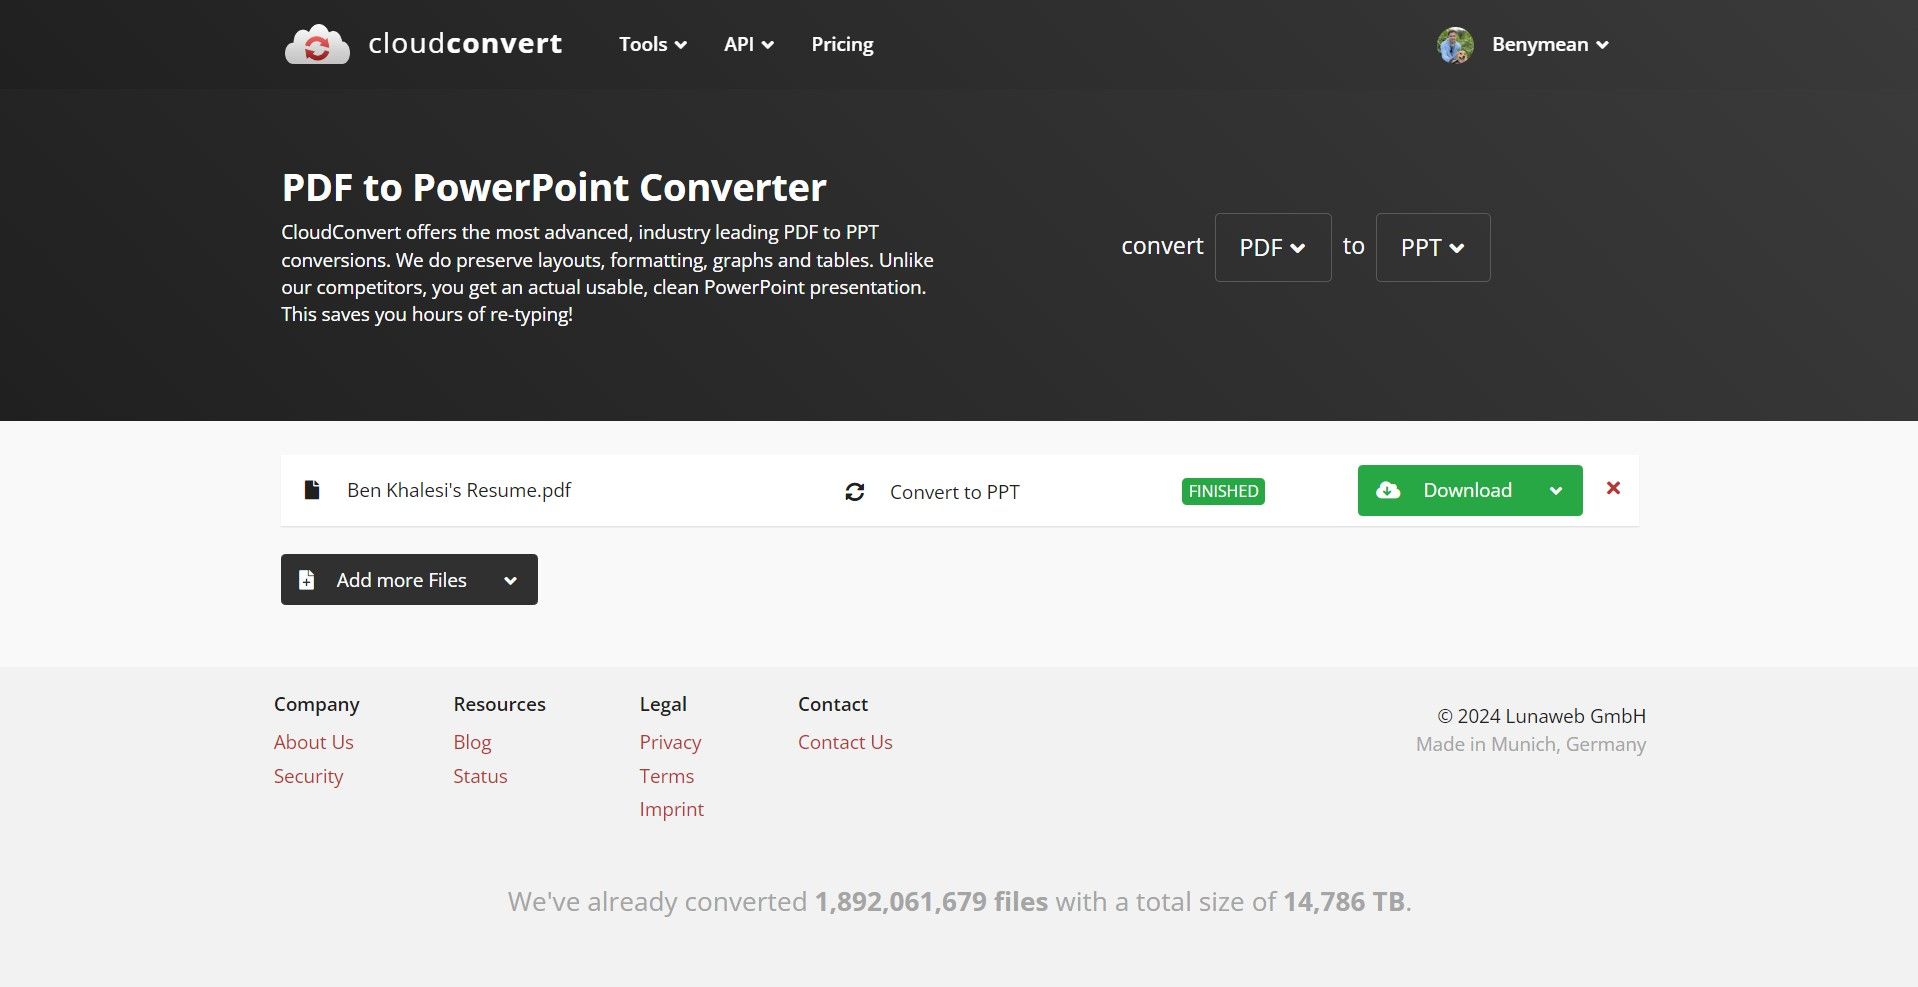
- Click Convert to begin the conversion.

- Click Download to save the new PowerPoint.

- Upload the PowerPoint file to Google Slides and edit it.
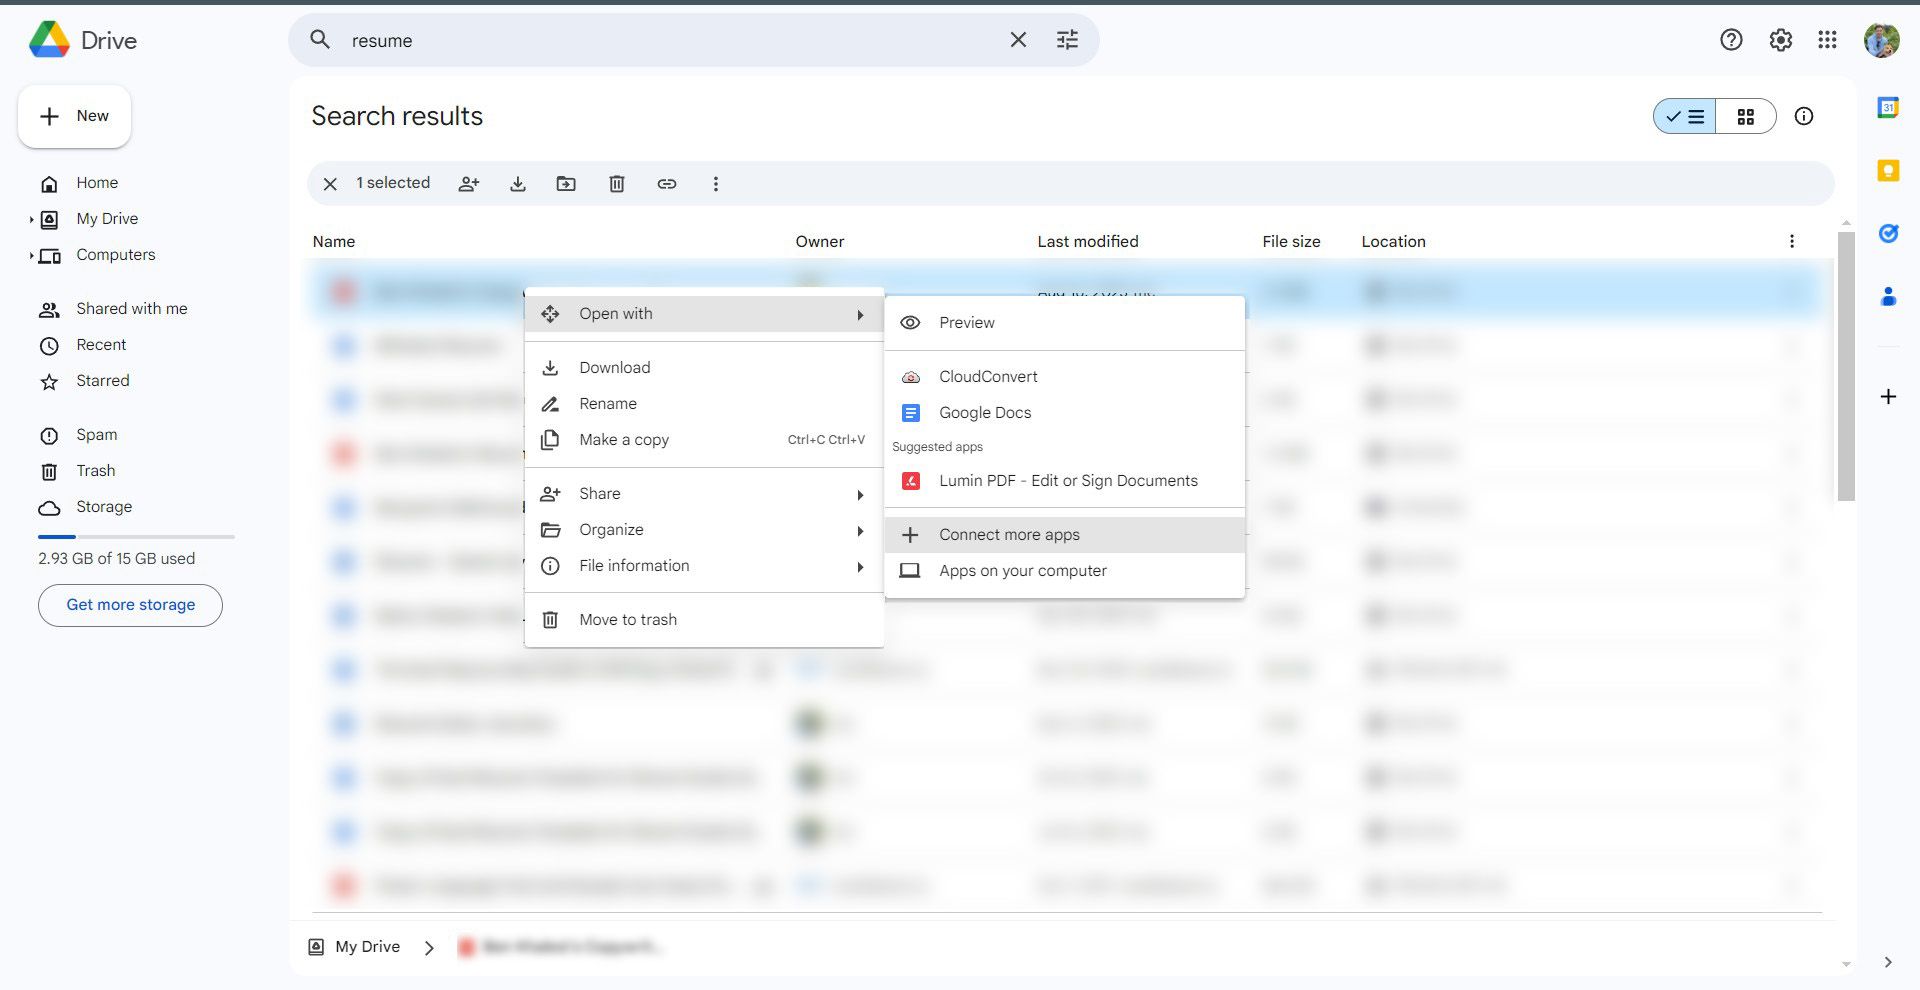
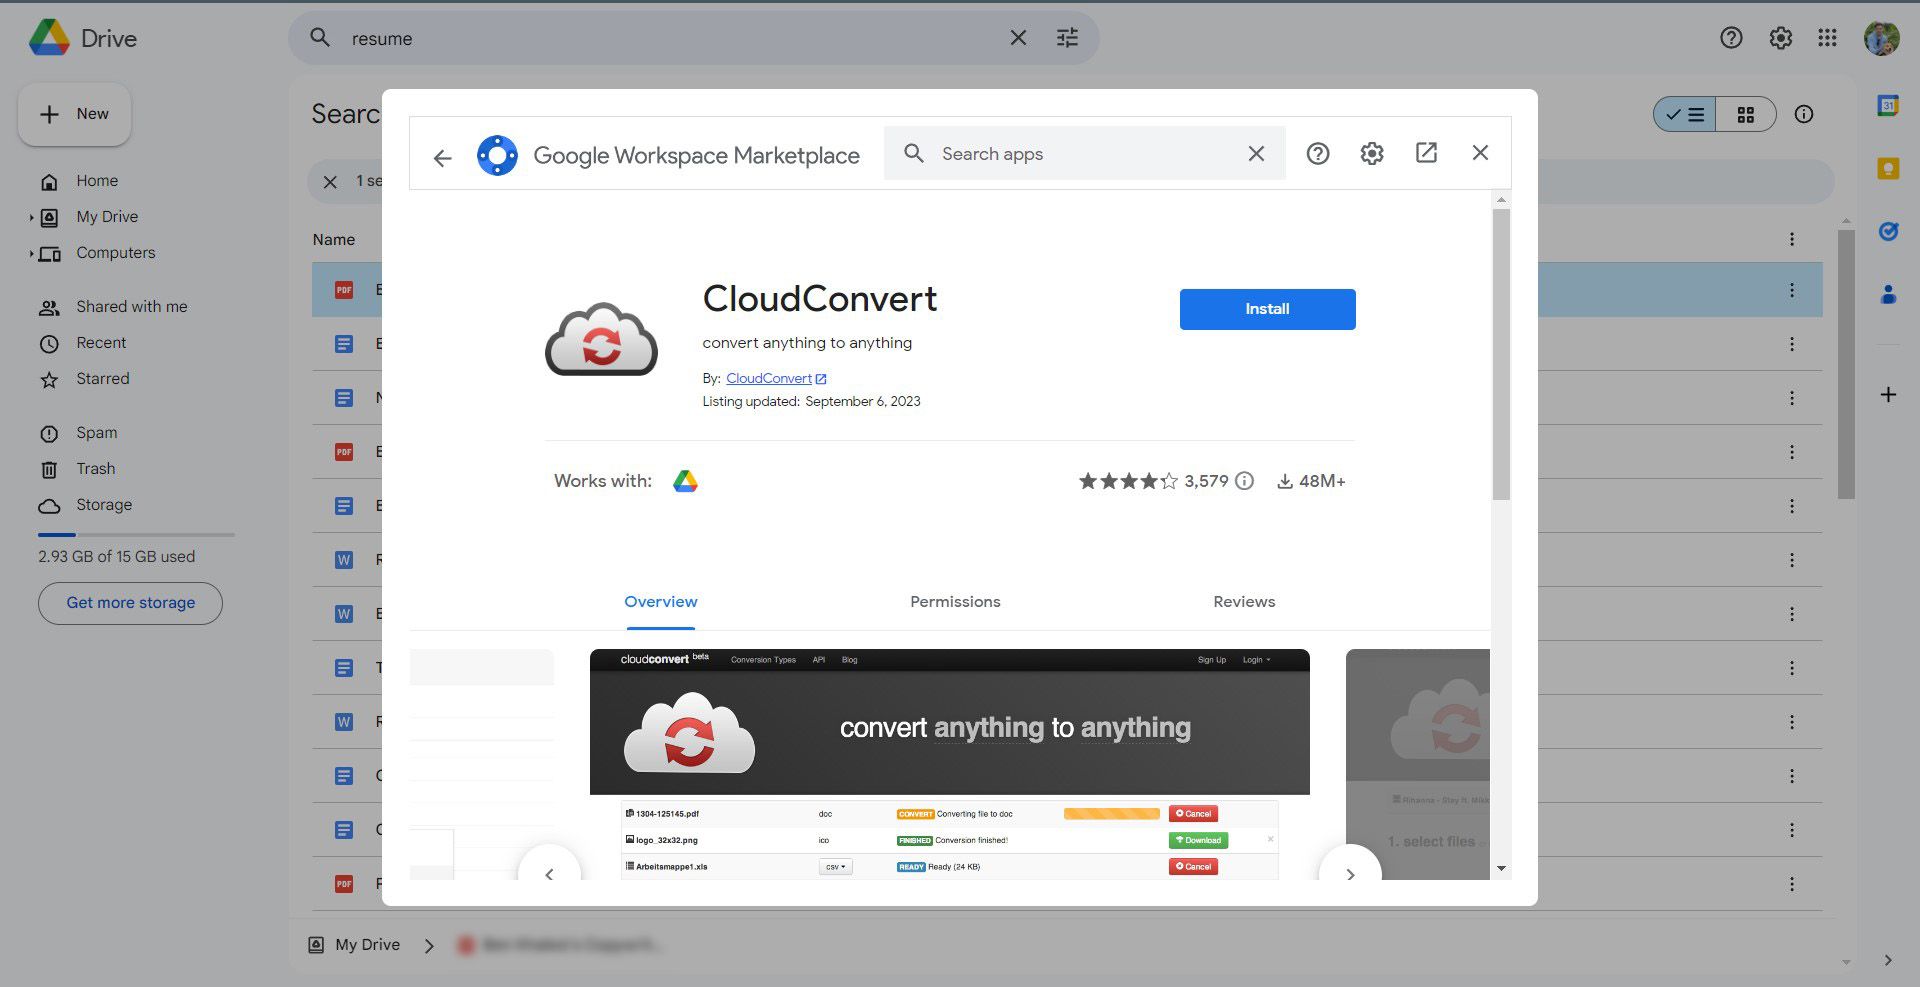
If your PDF is in Google Drive, add CloudConvert to your Google Workspace. With it, you can open and convert PDF files from your Google Drive. You can also open the file with Google Slides after the conversion. Here’s how to get it done:
- Navigate to the file you wish to convert from your Google Drive and right-click it.
- Choose Open with, then select Connect more apps to access the Google Workspace Marketplace.

- Search for CloudConvert in the marketplace and click Install to add it to your apps.

- Select your Google account to link it with CloudConvert.
- Navigate to the Presentation menu and choose PPT or PPTX as your output format.
- Select Save output files to Google Drive. This ensures your converted file automatically saves to your Drive for easy access.

- Click Convert to start the conversion process from PDF to PowerPoint.
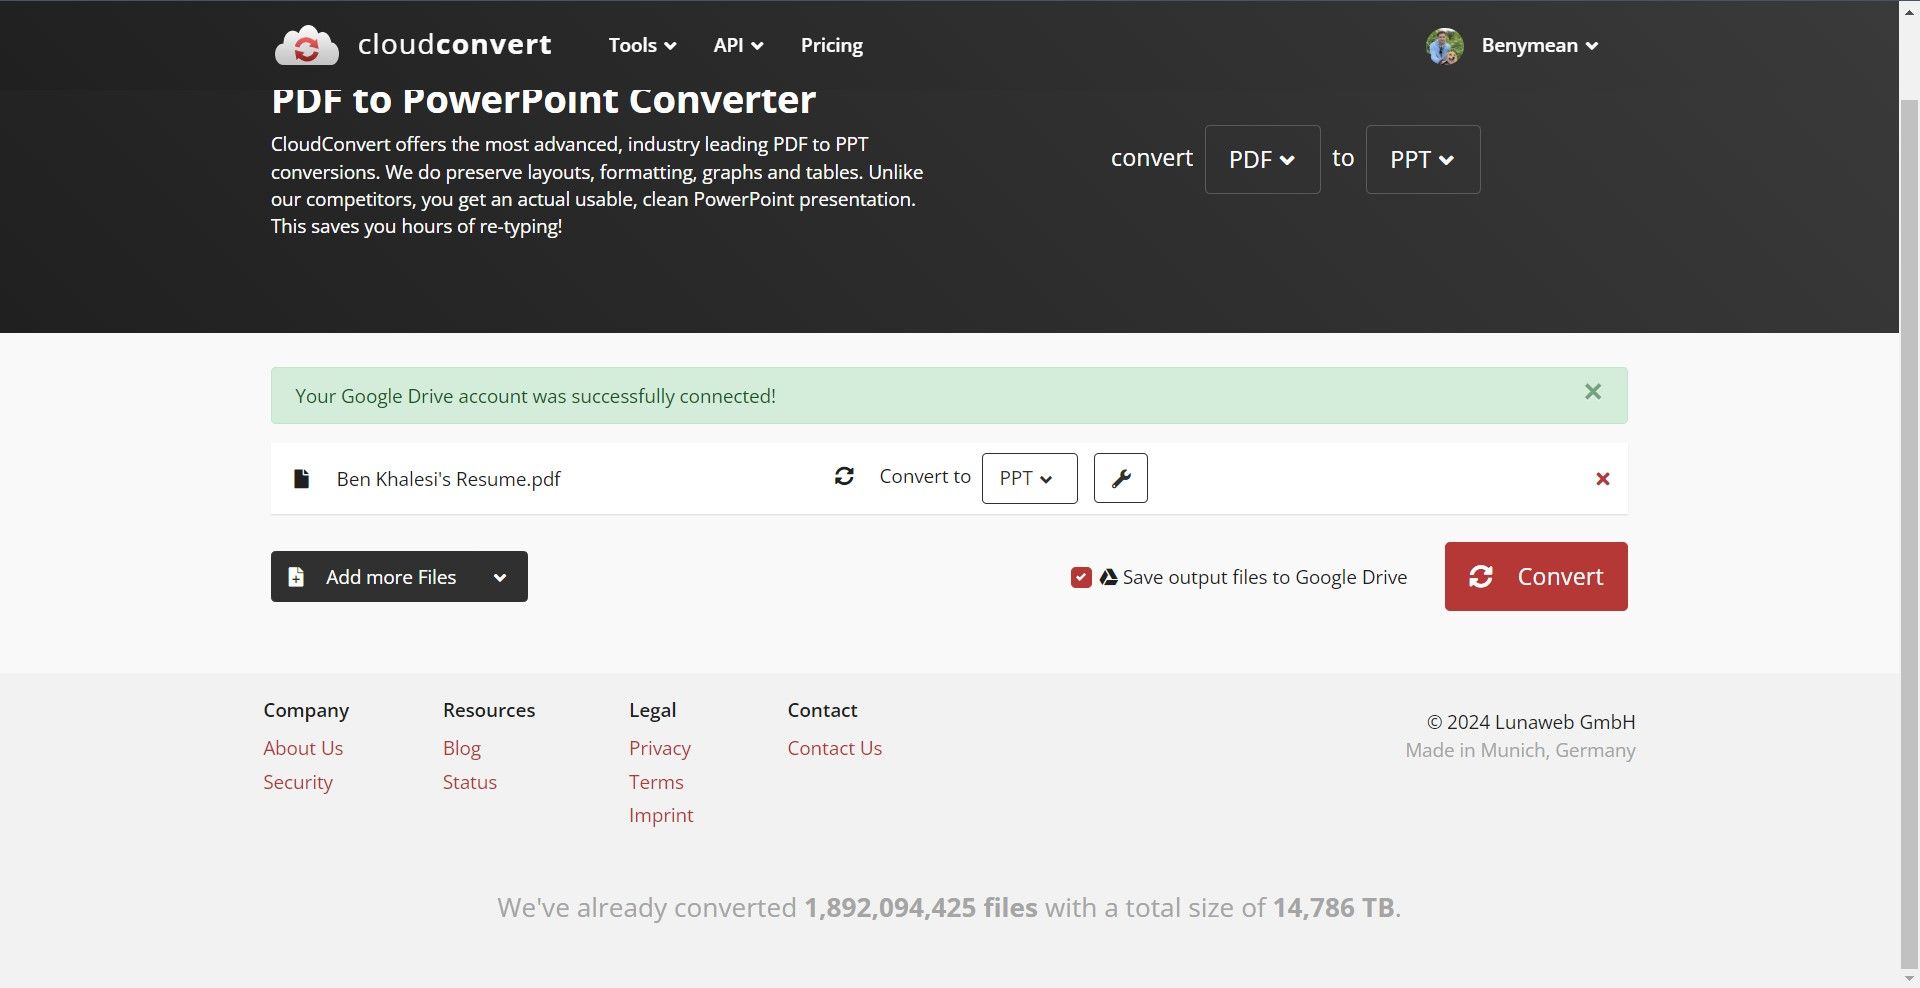
After conversion, you can open the downloaded file in Google Slides if you initiated the conversion from Google Drive. This step allows you to bypass the manual download and upload process, streamlining your workflow.
Converting PDF to images for Google Slides
If editing the text in your converted files isn’t a priority, convert your PDFs into images and insert them into your Google Slides presentations. The easiest way to do this is with software like Adobe Acrobat or alternative online tools.
This keeps the original formatting of your PDFs when inserting them into Google Slides. For this tutorial, Adobe Acrobat is our tool of choice. Here’s a step-by-step guide to converting your PDFs into images:
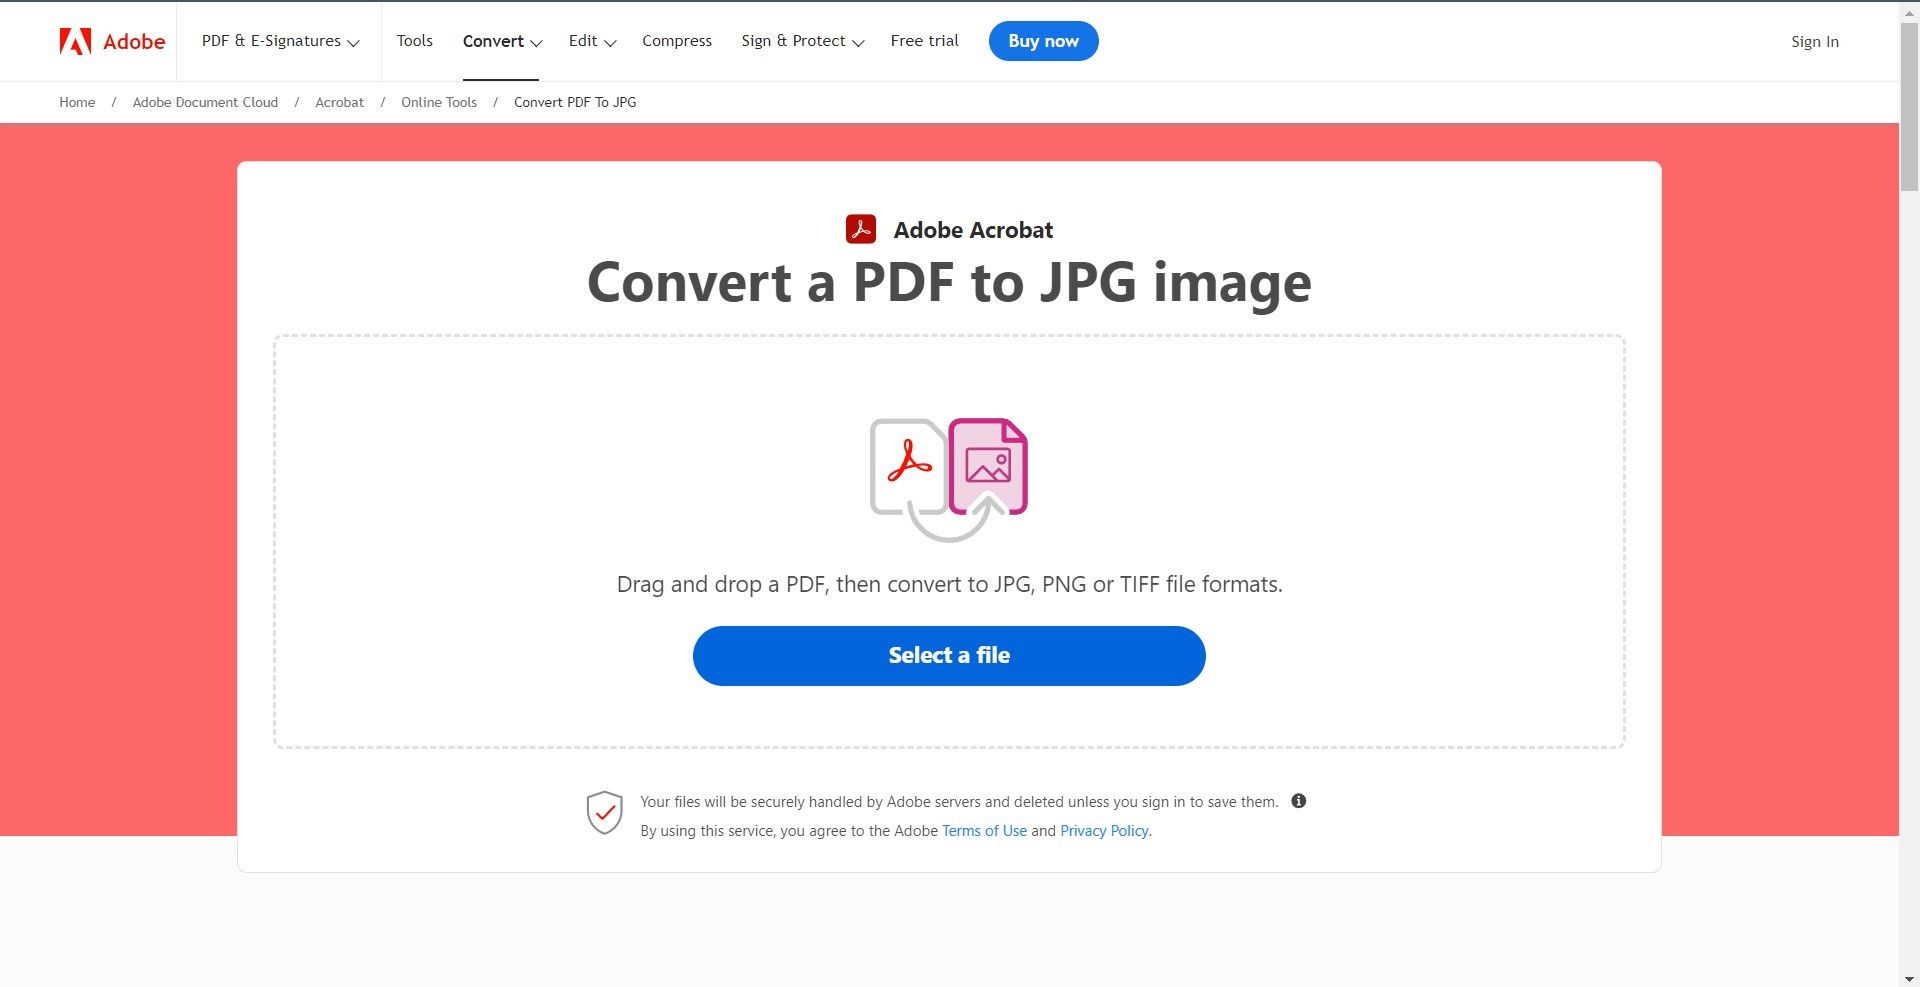
- Navigate to the Adobe Acrobat Convert PDF to JPG online tool.
- Add your PDF by dragging it to the converter box or clicking Select a file to browse and locate your PDF file.
- Download the ZIP file that contains your newly converted JPG images.
- Unzip the file to access your images. Choose a designated folder for easy access.
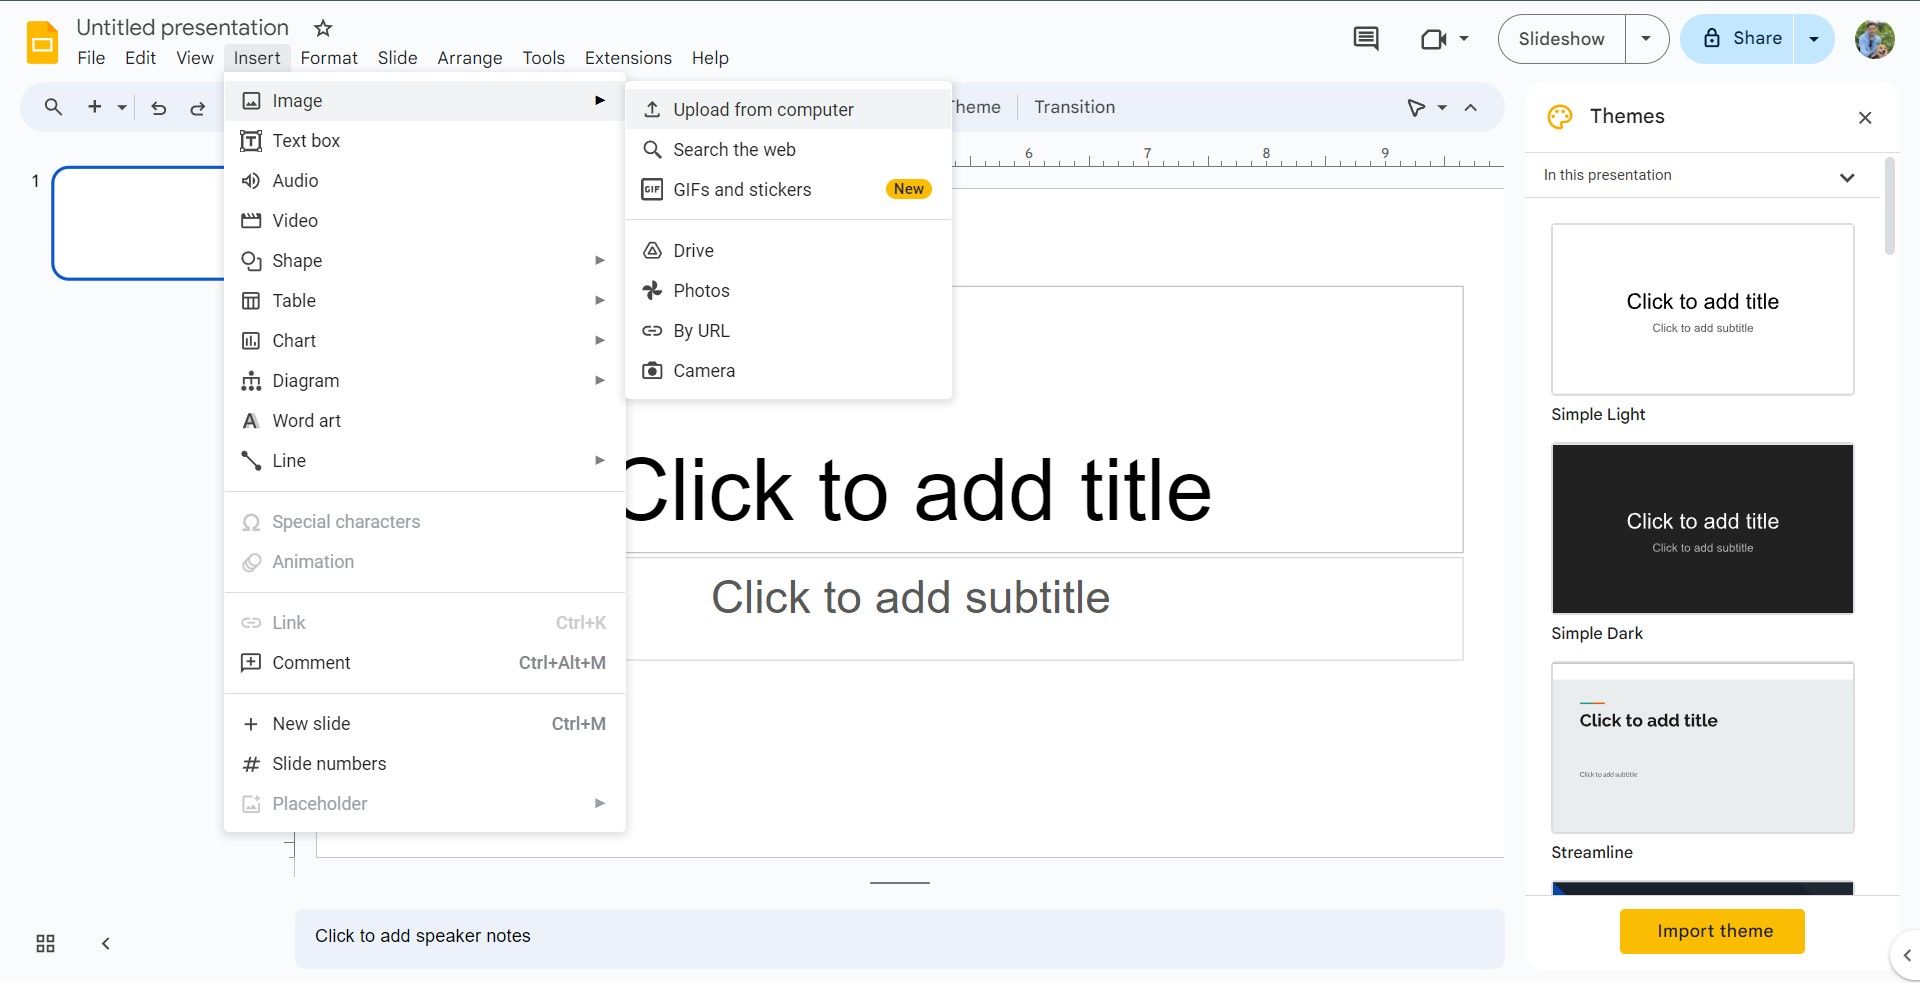
- Open Google Slides and start a new presentation. To add your images, click Insert from the menu, select Image, and then choose Upload from Computer.

- Navigate to where you unpacked your images and select the ones to include in your slides.
You can also add your converted images from Google Drive or another online platform.
Convert PDFs to Google Slides by sharing them as links
You can insert the PDF file as a link in Google Slides. End users can use the hyperlinked image or text in your presentation as a reference point to view the PDF file. You can do this by following these steps:
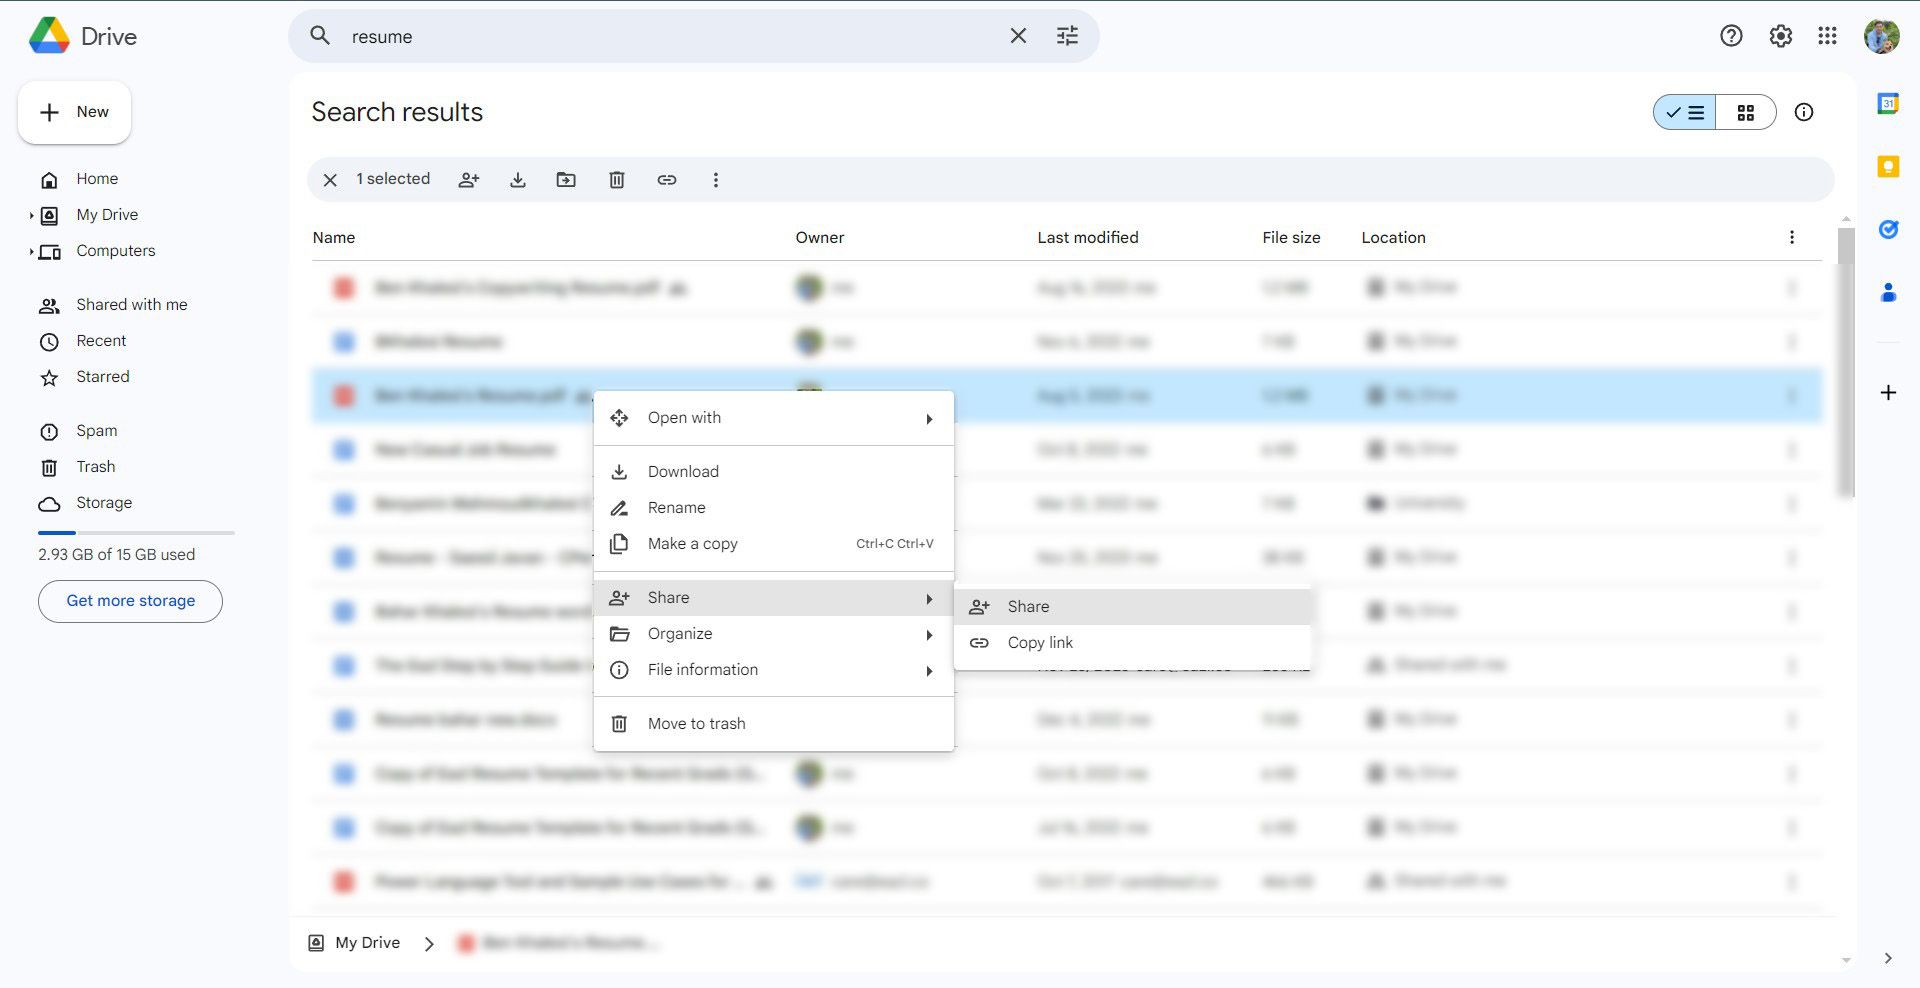
- Locate the PDF document you want to share in your Google Drive. Right-click the document and select Share from the menu.
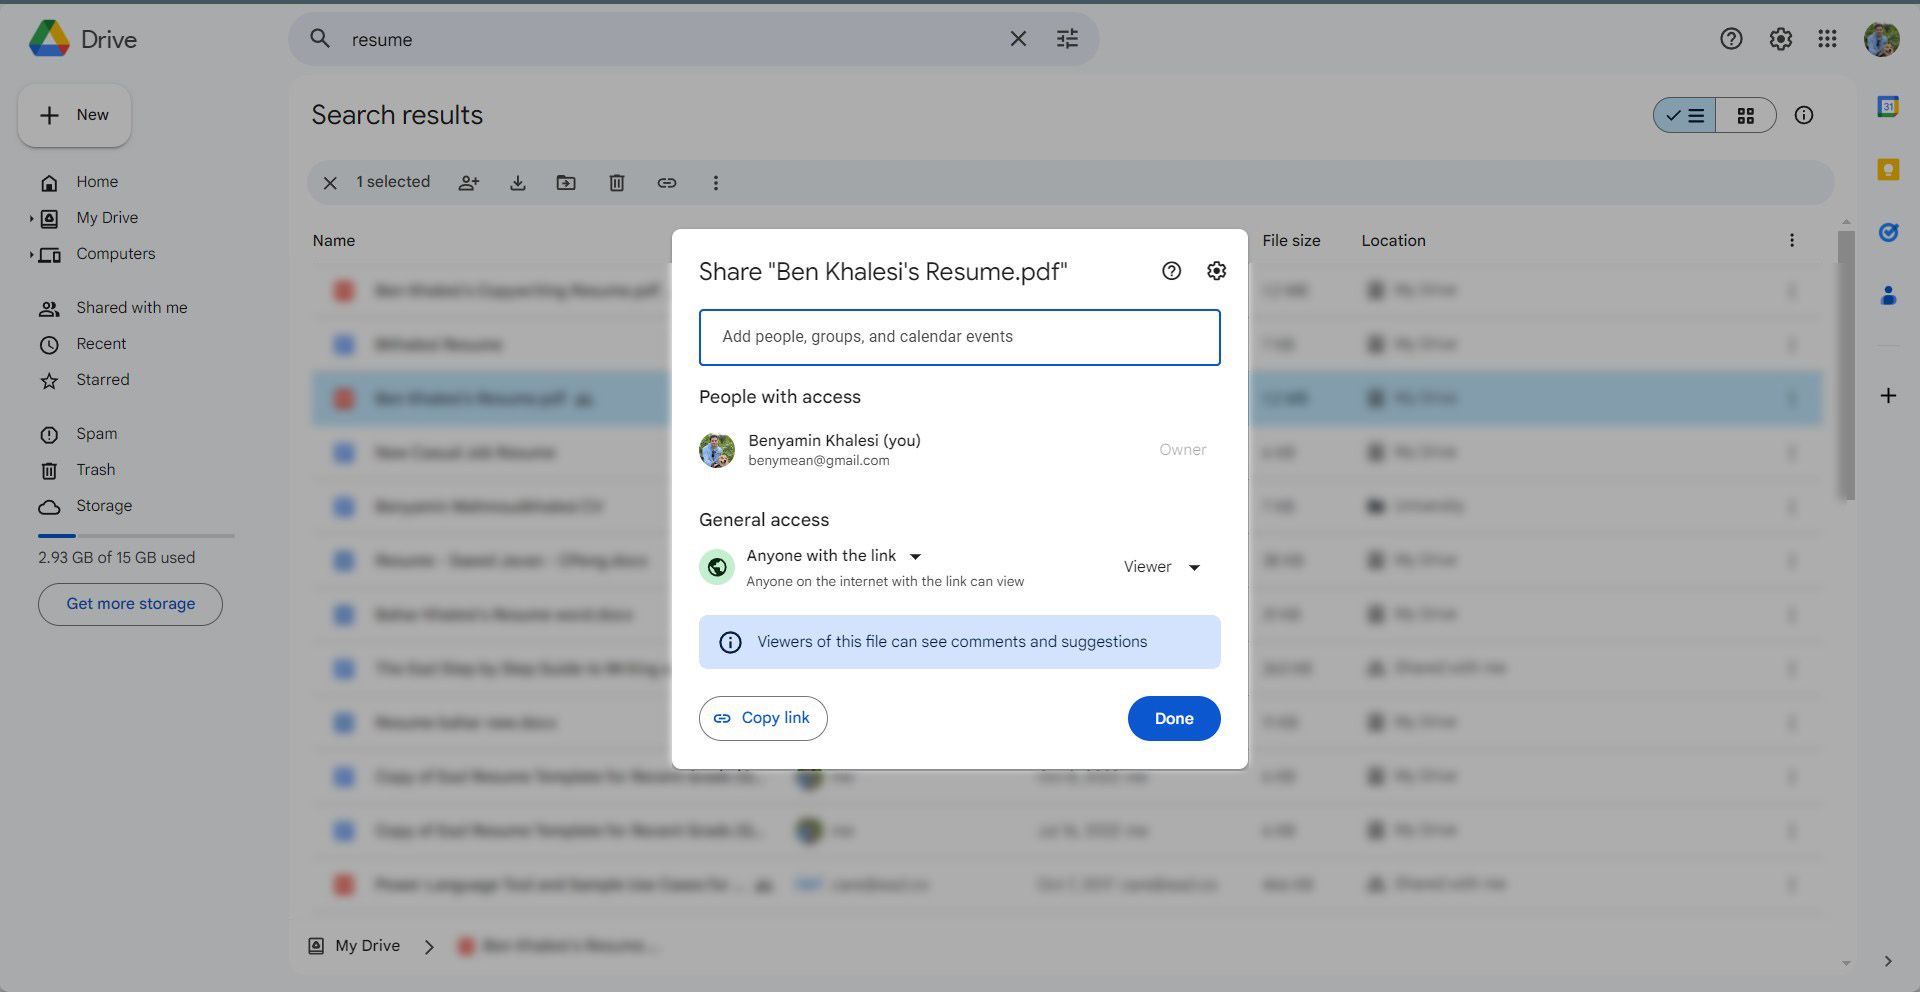
- Change access from Restricted to Anyone with the link in the sharing settings.

- Copy the shared link provided by Google Drive.
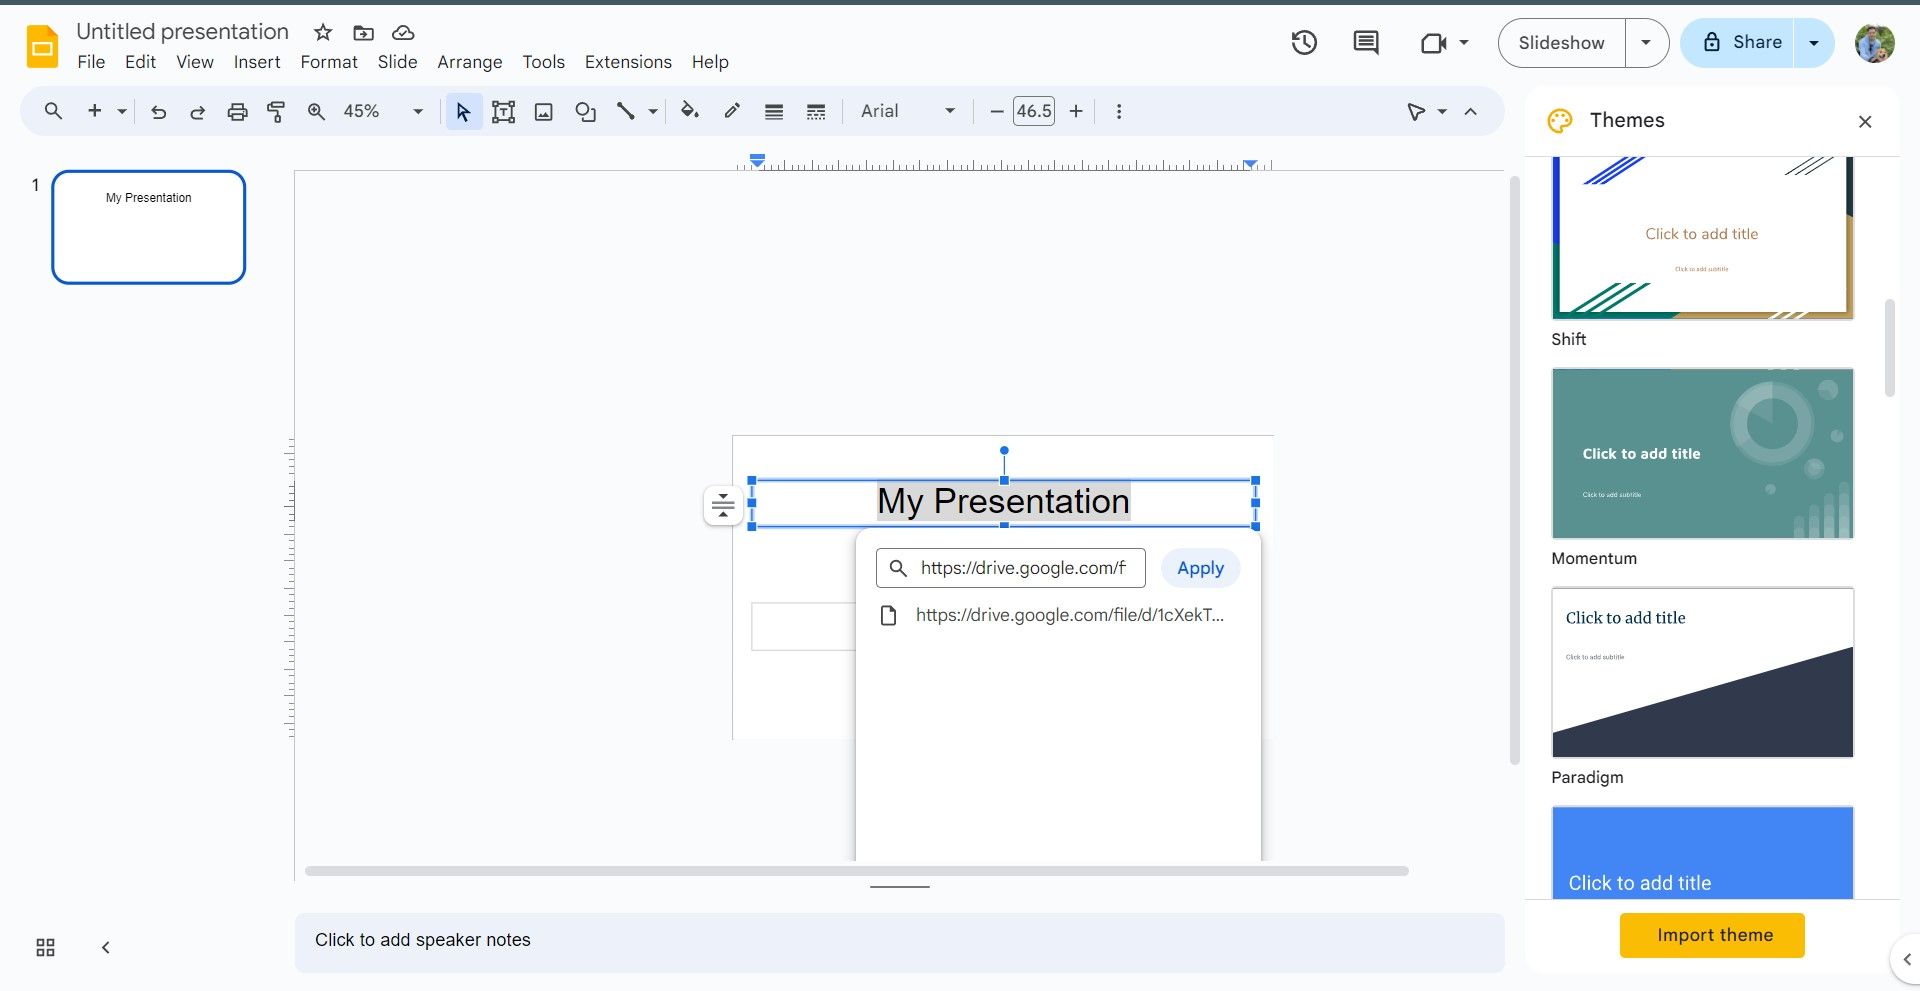
- Open your Google Slides presentation and decide where to insert this link. You can attach the hyperlink to various elements within your slides, such as images, text boxes, and shapes.

- Select the element (for example, an image or text) you want to hyperlink. Then, click the Insert menu, choose Link, and paste the copied URL into the field. Alternatively, after selecting the element, use the shortcut Ctrl + K (Cmd + K on Mac).
Take your presentations to the next level with AI tools
Now that you know how to convert a PDF to a Google Slides presentation, put your skills to the test and brag in front of your peers. Generative AIs like Google Gemini can make your presentations look even better, resulting in an informative and eye-catching presentation that leaves a lasting impression.