YouTube Music now allows linking to specific timestamps

Key Takeaways
- YouTube Music now supports sharing links with specific timestamps for easier playback.
- The app-specific share sheet includes a new toggle for selecting timestamps.
- This feature is useful for podcasts as well, offering more customized sharing options.
For years now, YouTube has remained one of the best entertainment apps for anyone seeking user-generated content instead of high-production value shows and movies. However, making videos easy to share plays a big role in ensuring users keep returning and more people use the service. Now, YouTube Music is taking steps to match the standards YouTube set for shareability, with support for starting playback at specific timestamps.
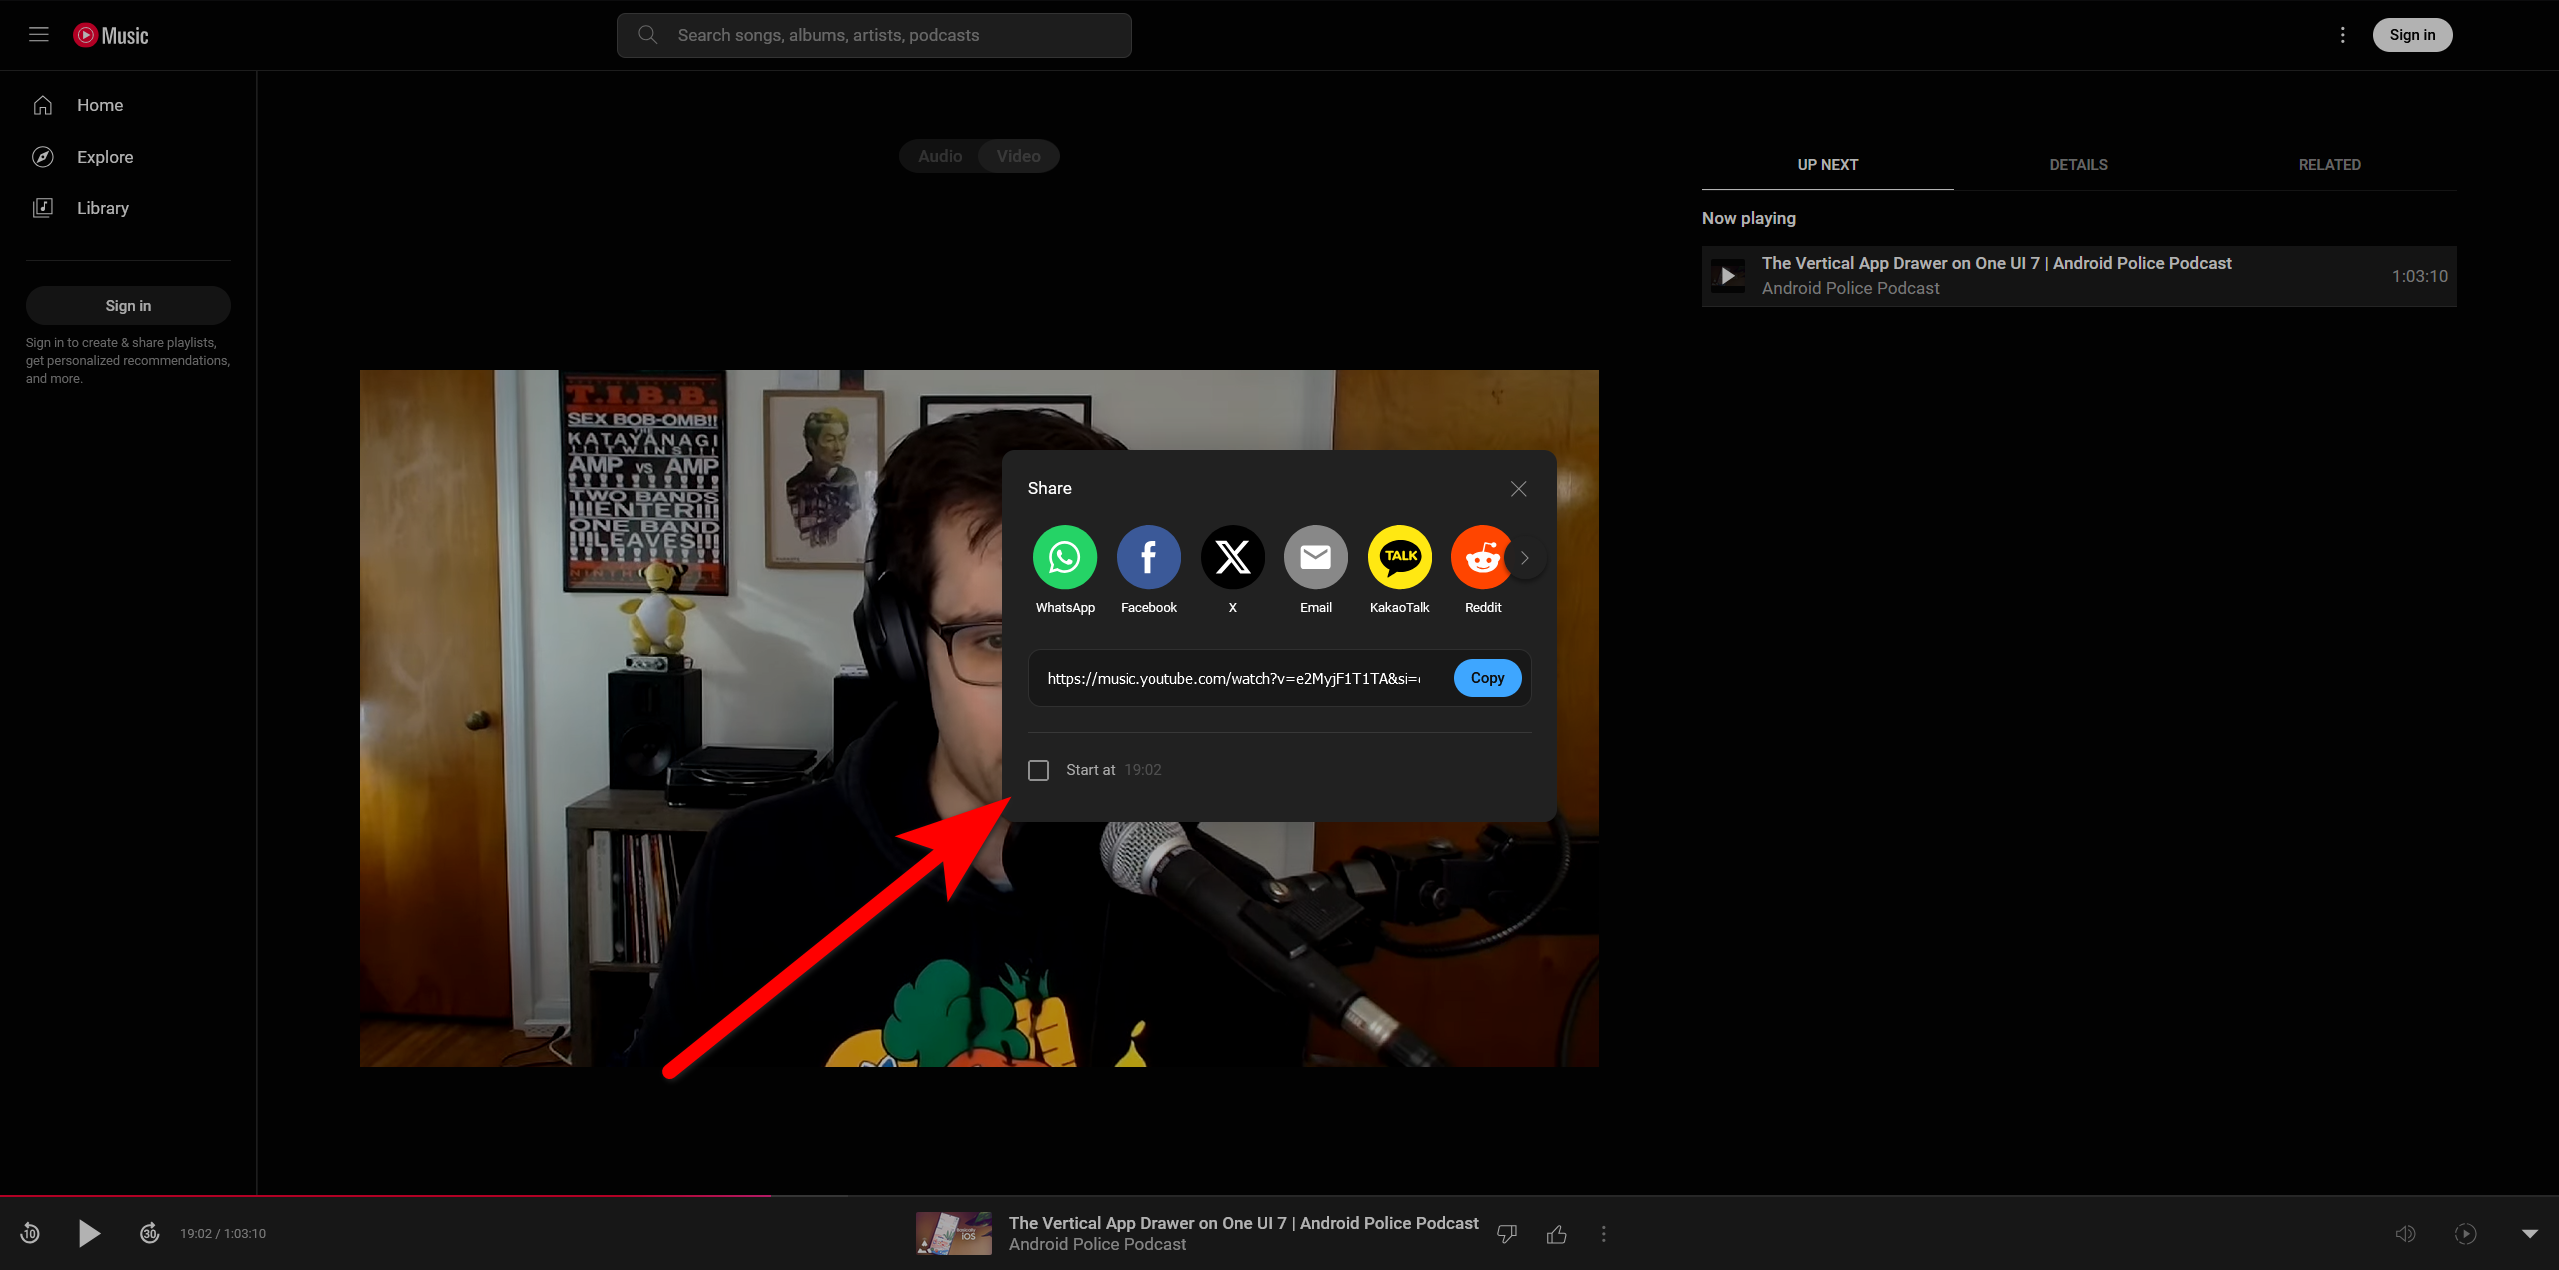
YouTube videos are easily shareable from every platform. If you choose to send someone a link to the video from the Android app or the web, you’ll see a checkbox to start playback at the currently selected timestamp. When checked, you can also alter the timestamp appended to the shareable URL. However, this feature wasn’t a part of the sister app, YouTube Music, until now.
The app-specific share sheet for YouTube Music was recently updated to include a new toggle in the upper right-hand corner, 9to5Google reports. Like the main YouTube app, it pulls the timestamp from when you tap the Share button. YouTube Music also retains the same URL syntax, with “&t=03” squeezed in there, where 03 is the timestamp in seconds.
Share timestamped links for podcasts too
Rolling out gradually
This system allows YouTube Music users to highlight specific segments of audio tracks, but will probably help even more with discussion-style podcasts where you can link to specific topics by timestamp. This update is reportedly rolling out as a server-side switch for the YouTube Music app on Android and iOS. However, we aren’t seeing it on our devices yet, running version 7.29.51 of the app.
That said, you might get a head-start using this feature from the web UI.