

6 settings I change on every Chromebook

I love Chromebooks. They’re fun and useful devices, and I appreciate the simplicity they provide over Windows and macOS. I also appreciate that there are Chromebooks for everyone, whether you want a budget-oriented device or a premium experience. While the out-of-the-box experience for Chromebooks is pretty good, I change some settings to make it better.
6
Connect your phone
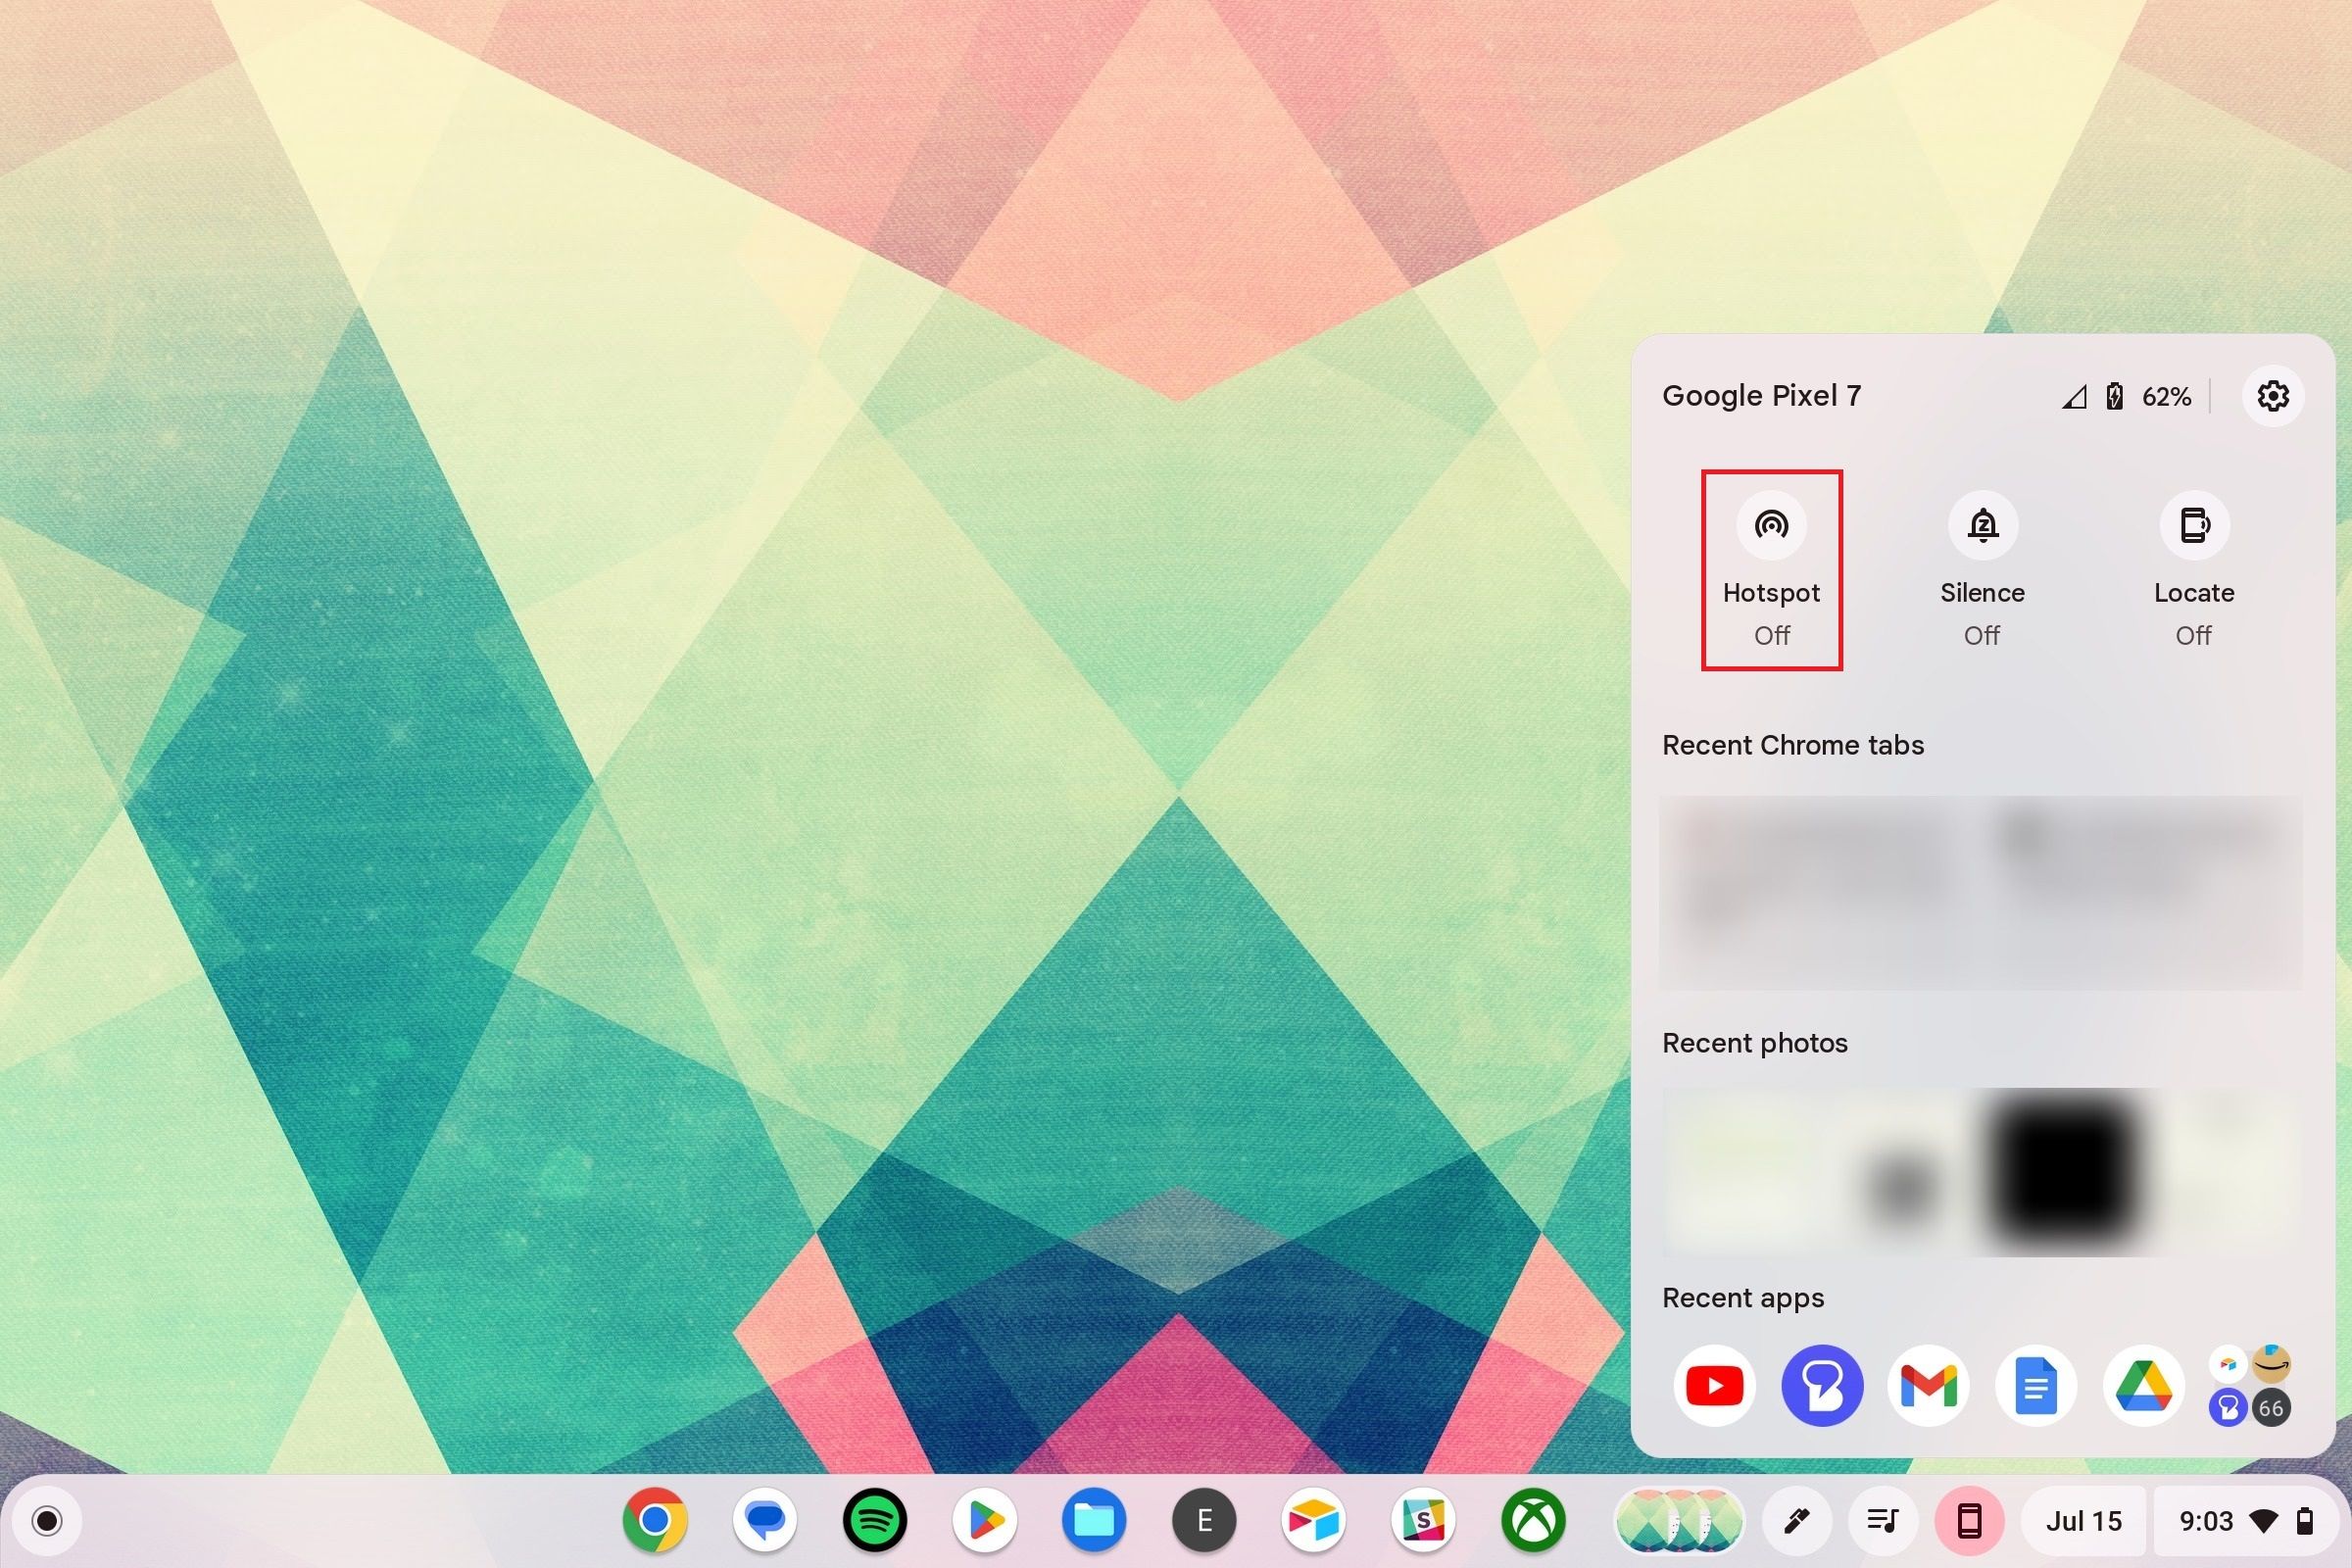
Chromebooks have deep integration with Android phones when you activate it through the Phone Hub. Using the Phone Hub, you can use your phone’s internet connection, access your recent Chrome tabs, and view your recent photos. You can also stream your apps from your phone on your Chromebook. I love the Phone Hub because it allows me to access my phone while using my Chromebook without even picking it up.
Activating the Phone Hub is simple. Open the Settings app and go to Connected devices. Under Android phone, tap the Set up button. You’ll type in your Google Account password and click through a few prompts, and then you’ll be all set. You can modify several settings related to your phone by going back into Android phone settings.

Related
How to use Phone Hub to connect your Chromebook and Android phone
Google’s ecosystem connectivity is getting better and better
5
Reverse the scrolling
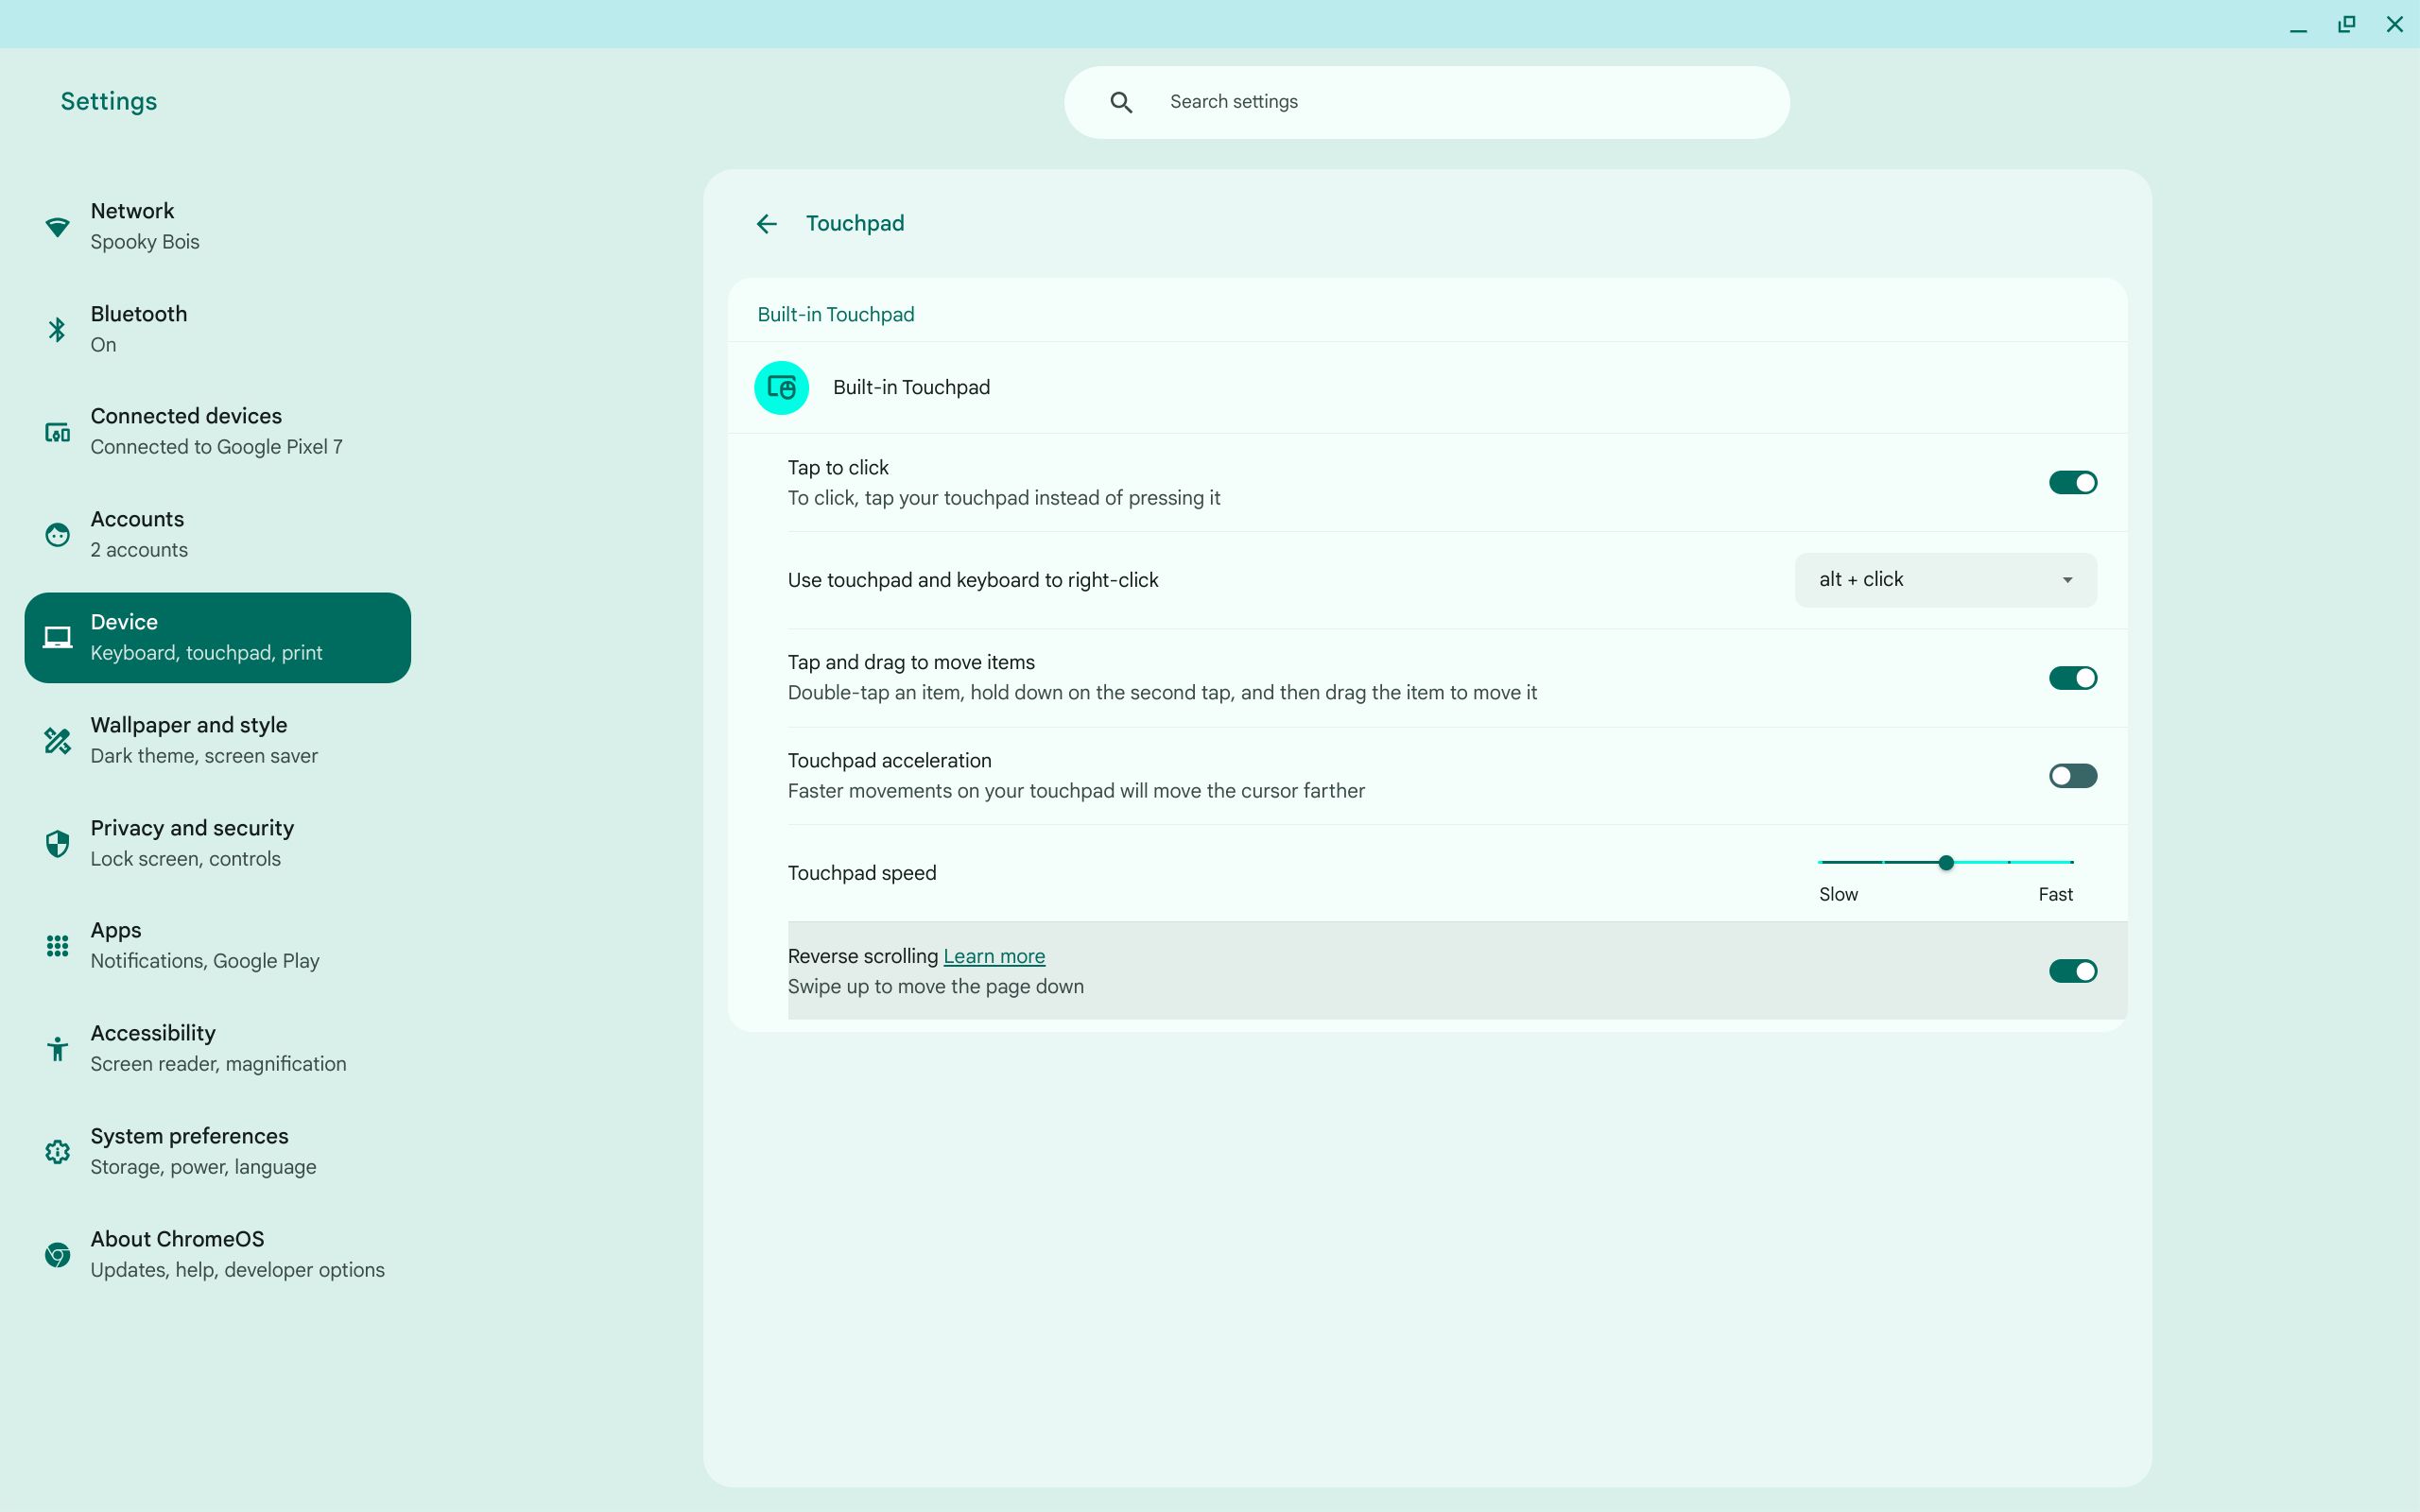
I don’t know if it’s just me, but at some point, it seems I started using reverse scrolling. I find it helpful when I drag my fingers down on the touchpad, and the page scrolls upward and vice versa. However, this is not the default for Chromebooks. They have “normal” scrolling on by default. This means I need to change this when I set up a new Chromebook.
This setting is found by opening the settings app, going to Device > Touchpad, and turning on the Reverse scrolling toggle. While you’re there, change the touchpad speed to your desired level.
4
Turn on Night Light
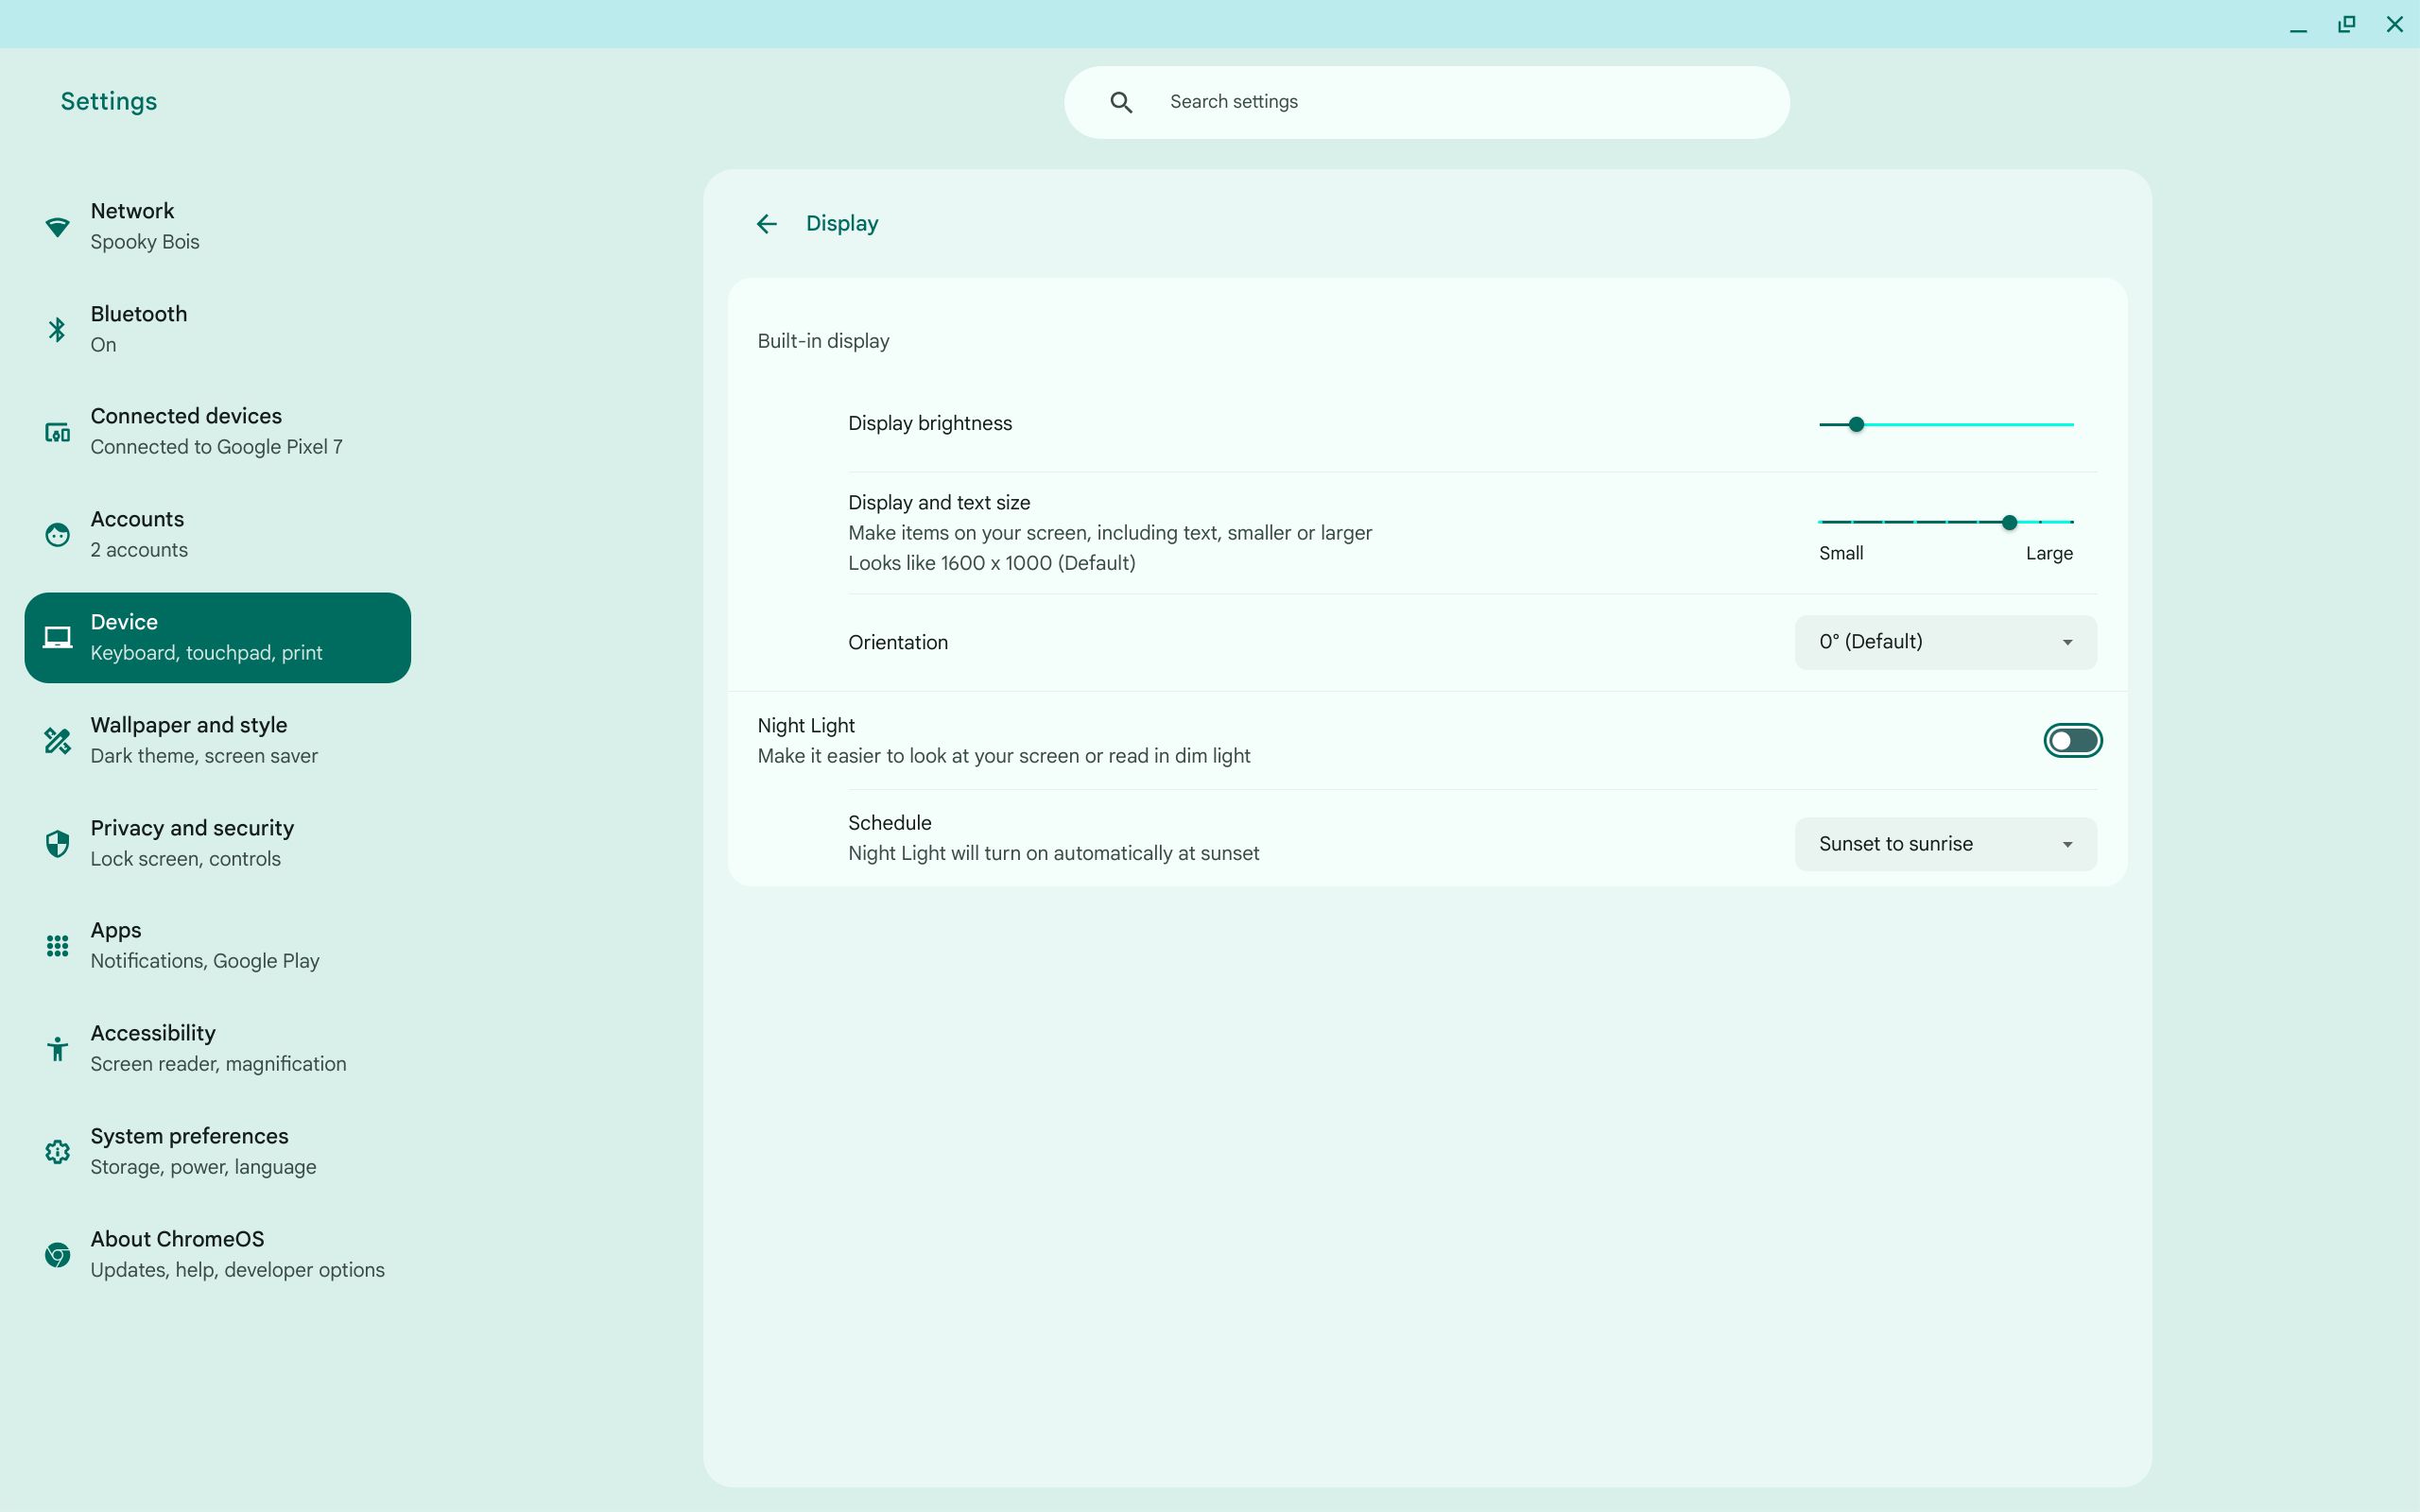
I look at screens for so long each day that it’s important to take steps to protect my eyes. That means enabling the night light to shield my eyes from blue light at night. Night light removes the blue light from the screen and makes it more red, which is better for the eyes, especially before bed. I turn on this setting to automatically turn on from sunset to sunrise because that’s when the brightness of the blue light hurts my eyes the most.
To activate this setting, go to Device > Display in the settings app. There, set whether you’d like Night Light on all the time, never, or from sunset to sunrise. You can also set the color temperature of the Night Light or turn it on using the toggle.
3
Change wallpaper and accent color

In addition to changing settings to my liking, I also customize my Chromebook. I do this by changing the wallpaper and accent color for the UI. Google offers a lot of great wallpapers. With a Chromebook Plus device, you can access more wallpapers, including AI-generated ones. I enjoy cycling through a collection of wallpapers so that they change each day and give my device a new look.
To modify the wallpaper and accent color settings, right-click on your wallpaper and select Set wallpaper & style. Here, you’re presented with a menu that allows you to select a wallpaper from a list of preset wallpapers from Google, or you can select your own photo. You can also select an accent color, which provides Material You theming to the UI, similar to an Android phone.
2
Modify the items pinned to the shelf
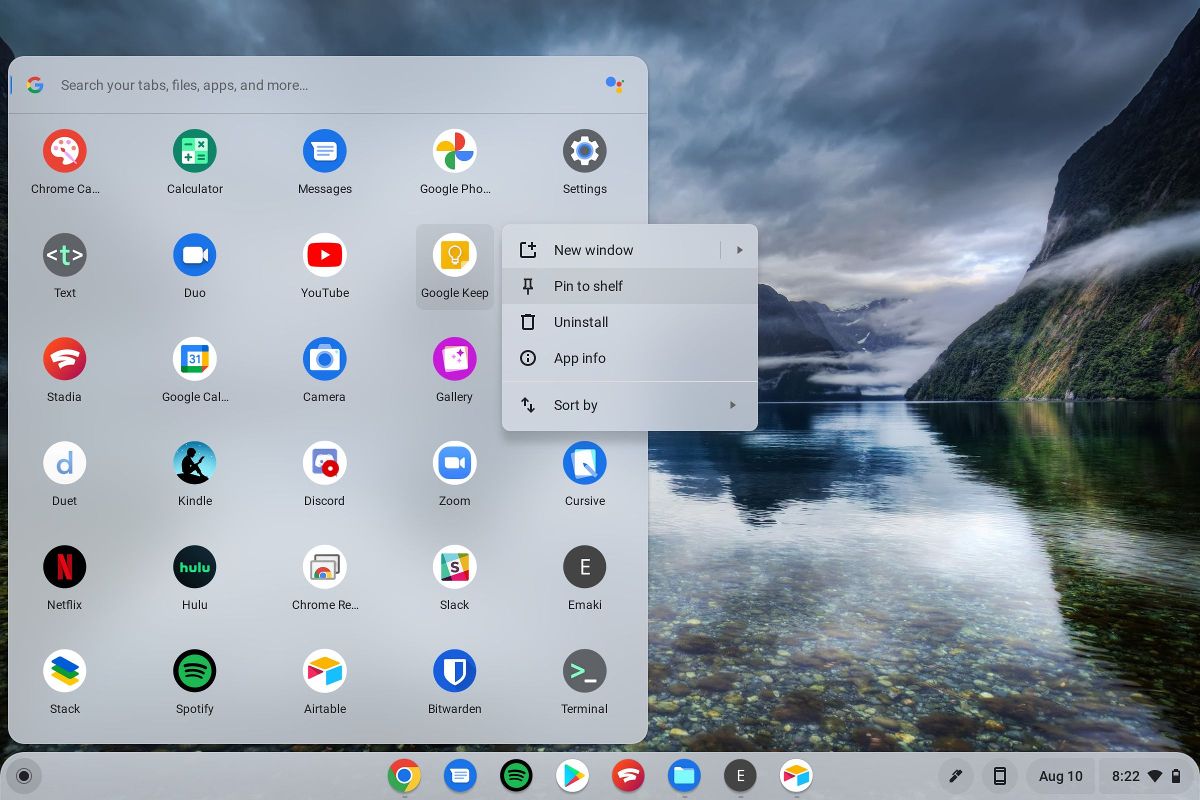
The shelf is where you pin apps and websites to make them easily accessible. By default, Gemini, Google Chrome, and other Google apps are pinned. I like to change the items on the shelf to be customized to what I use often. For example, while I’m writing, I like to listen to Spotify, so I pinned the Spotify app to my shelf. I also pinned the Google Messages app so that I can text others while on my computer without picking up my phone.
Adding items to your shelf is easy, and we have a guide on how to pin apps and websites to it. It’s easier to pin apps than websites, as you need to go through Chrome settings to pin a website. You can also rearrange the order of the items on the shelf and access them using keyboard shortcuts.
Related
How to pin apps and websites to your Chromebook’s shelf
Access your favorite apps and websites on your Chromebook in seconds
1
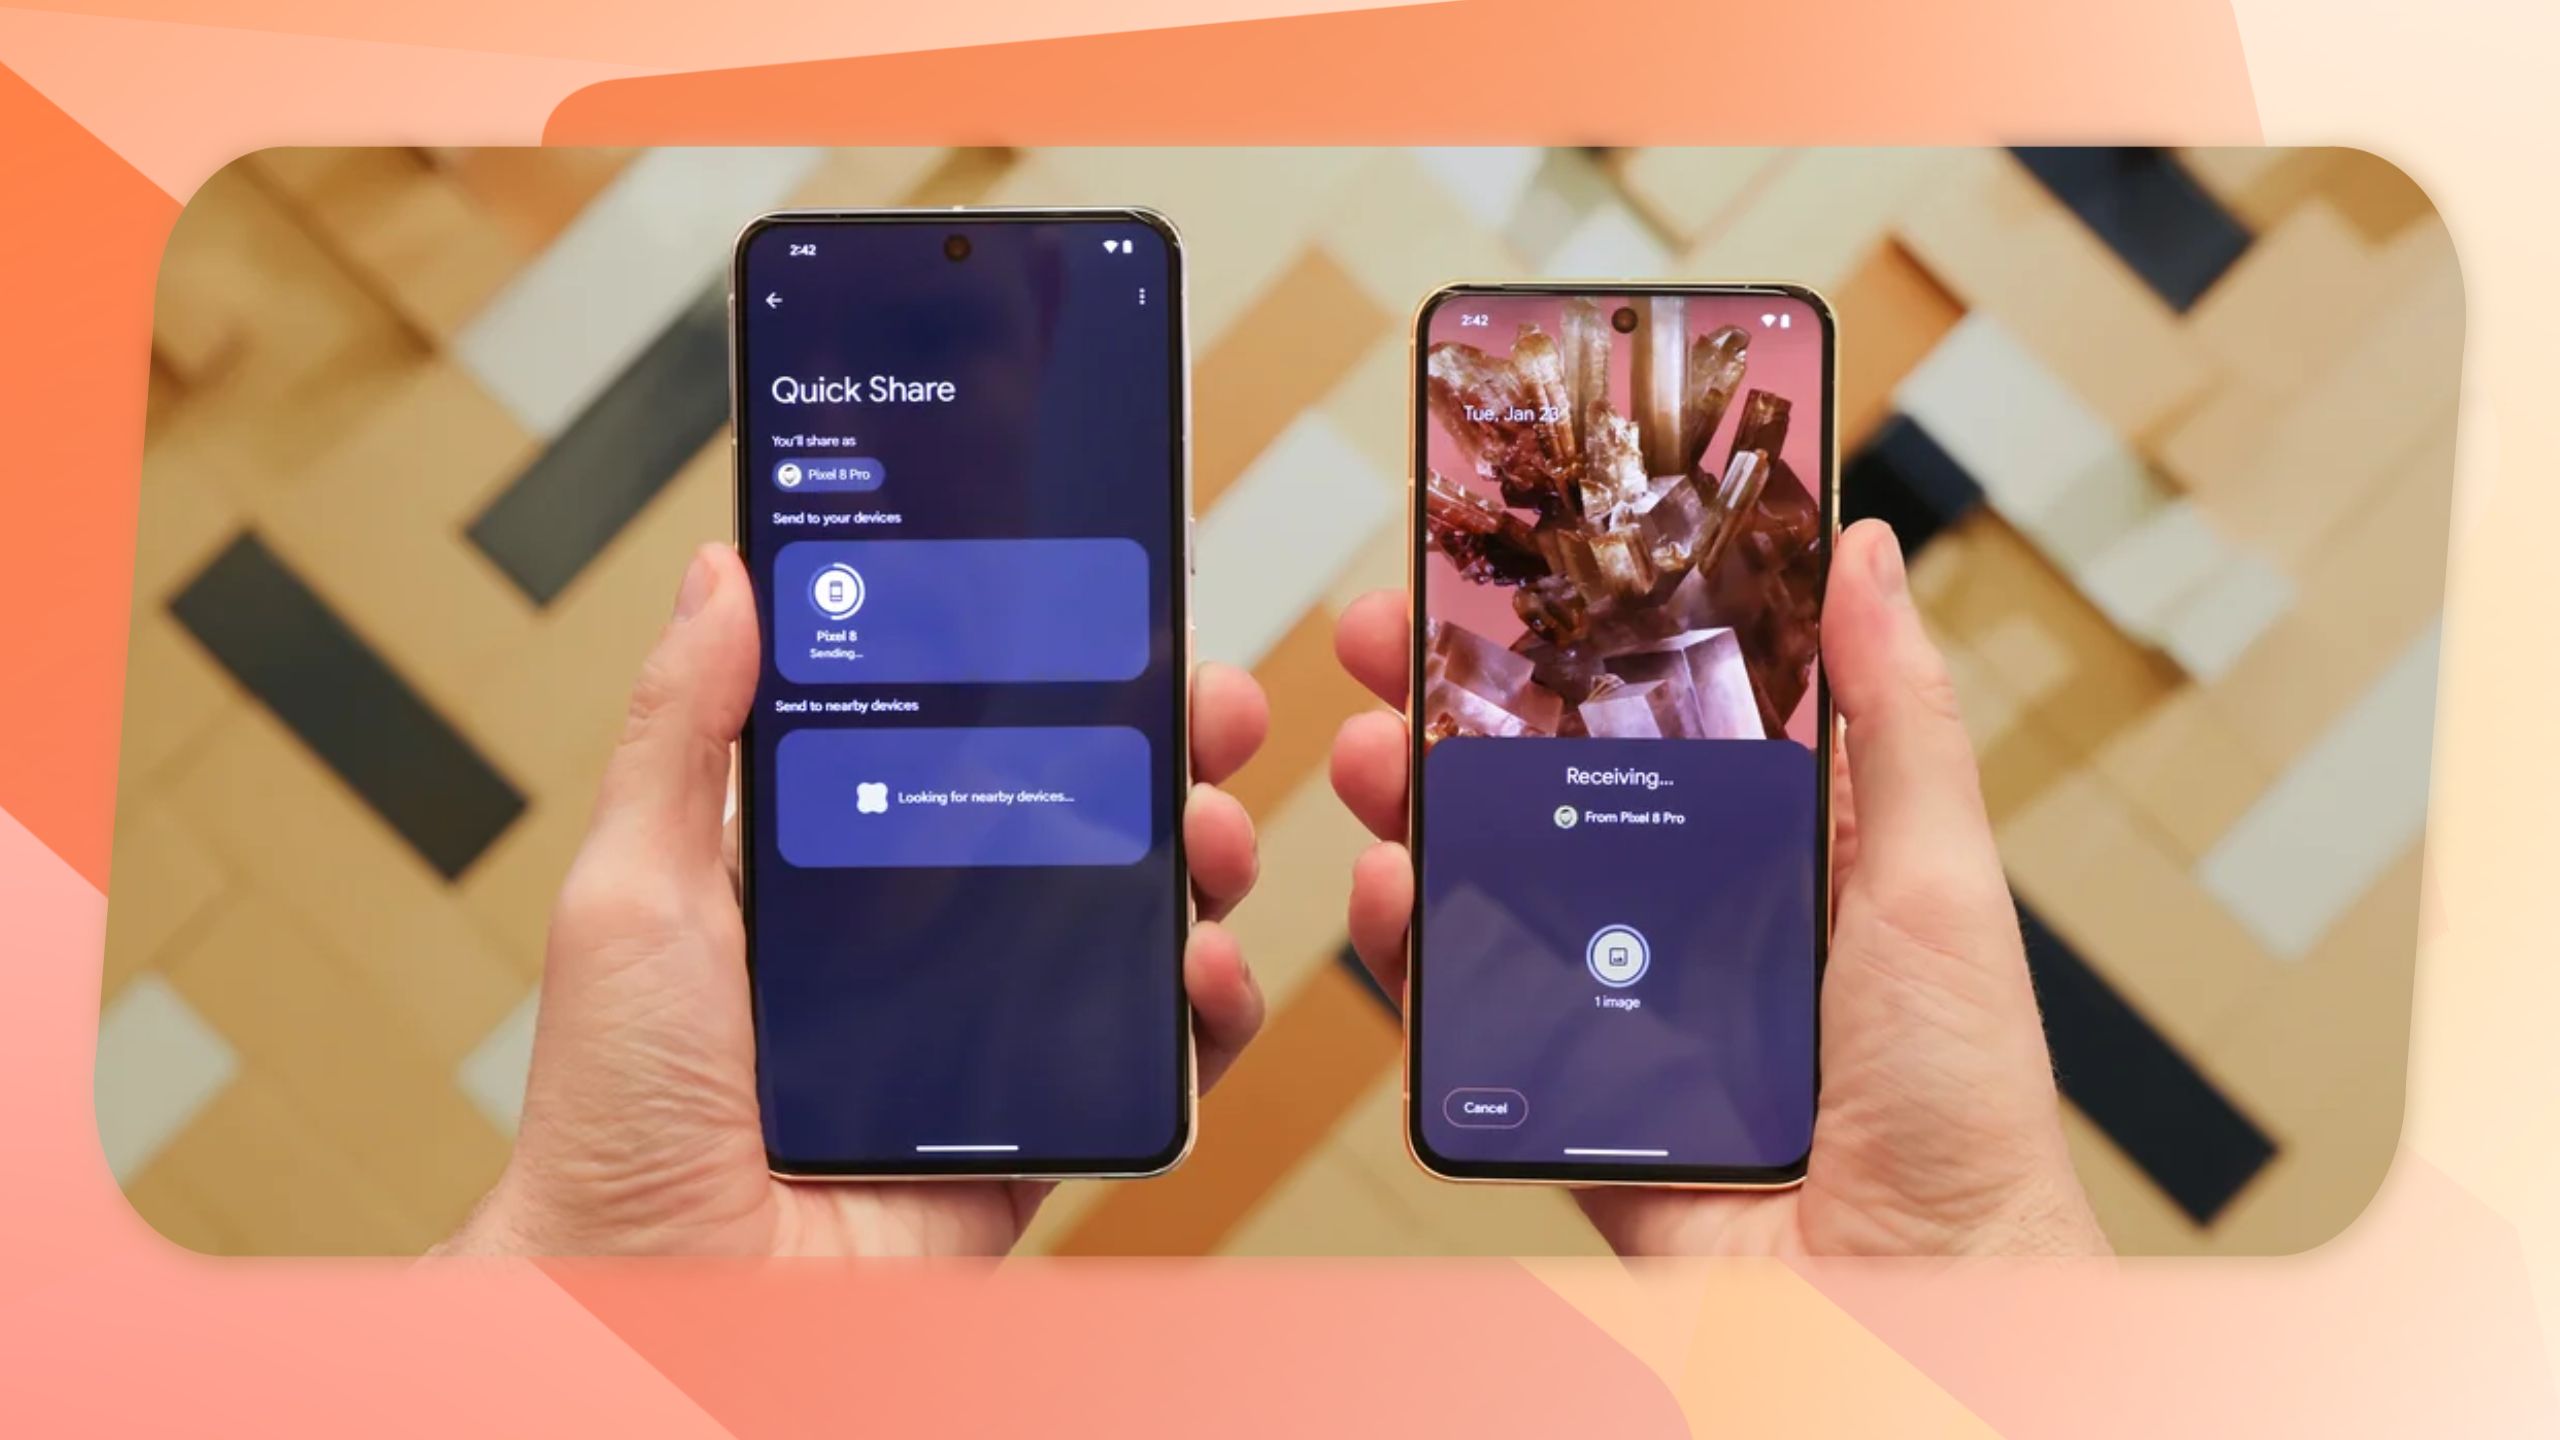
Set up Quick Share
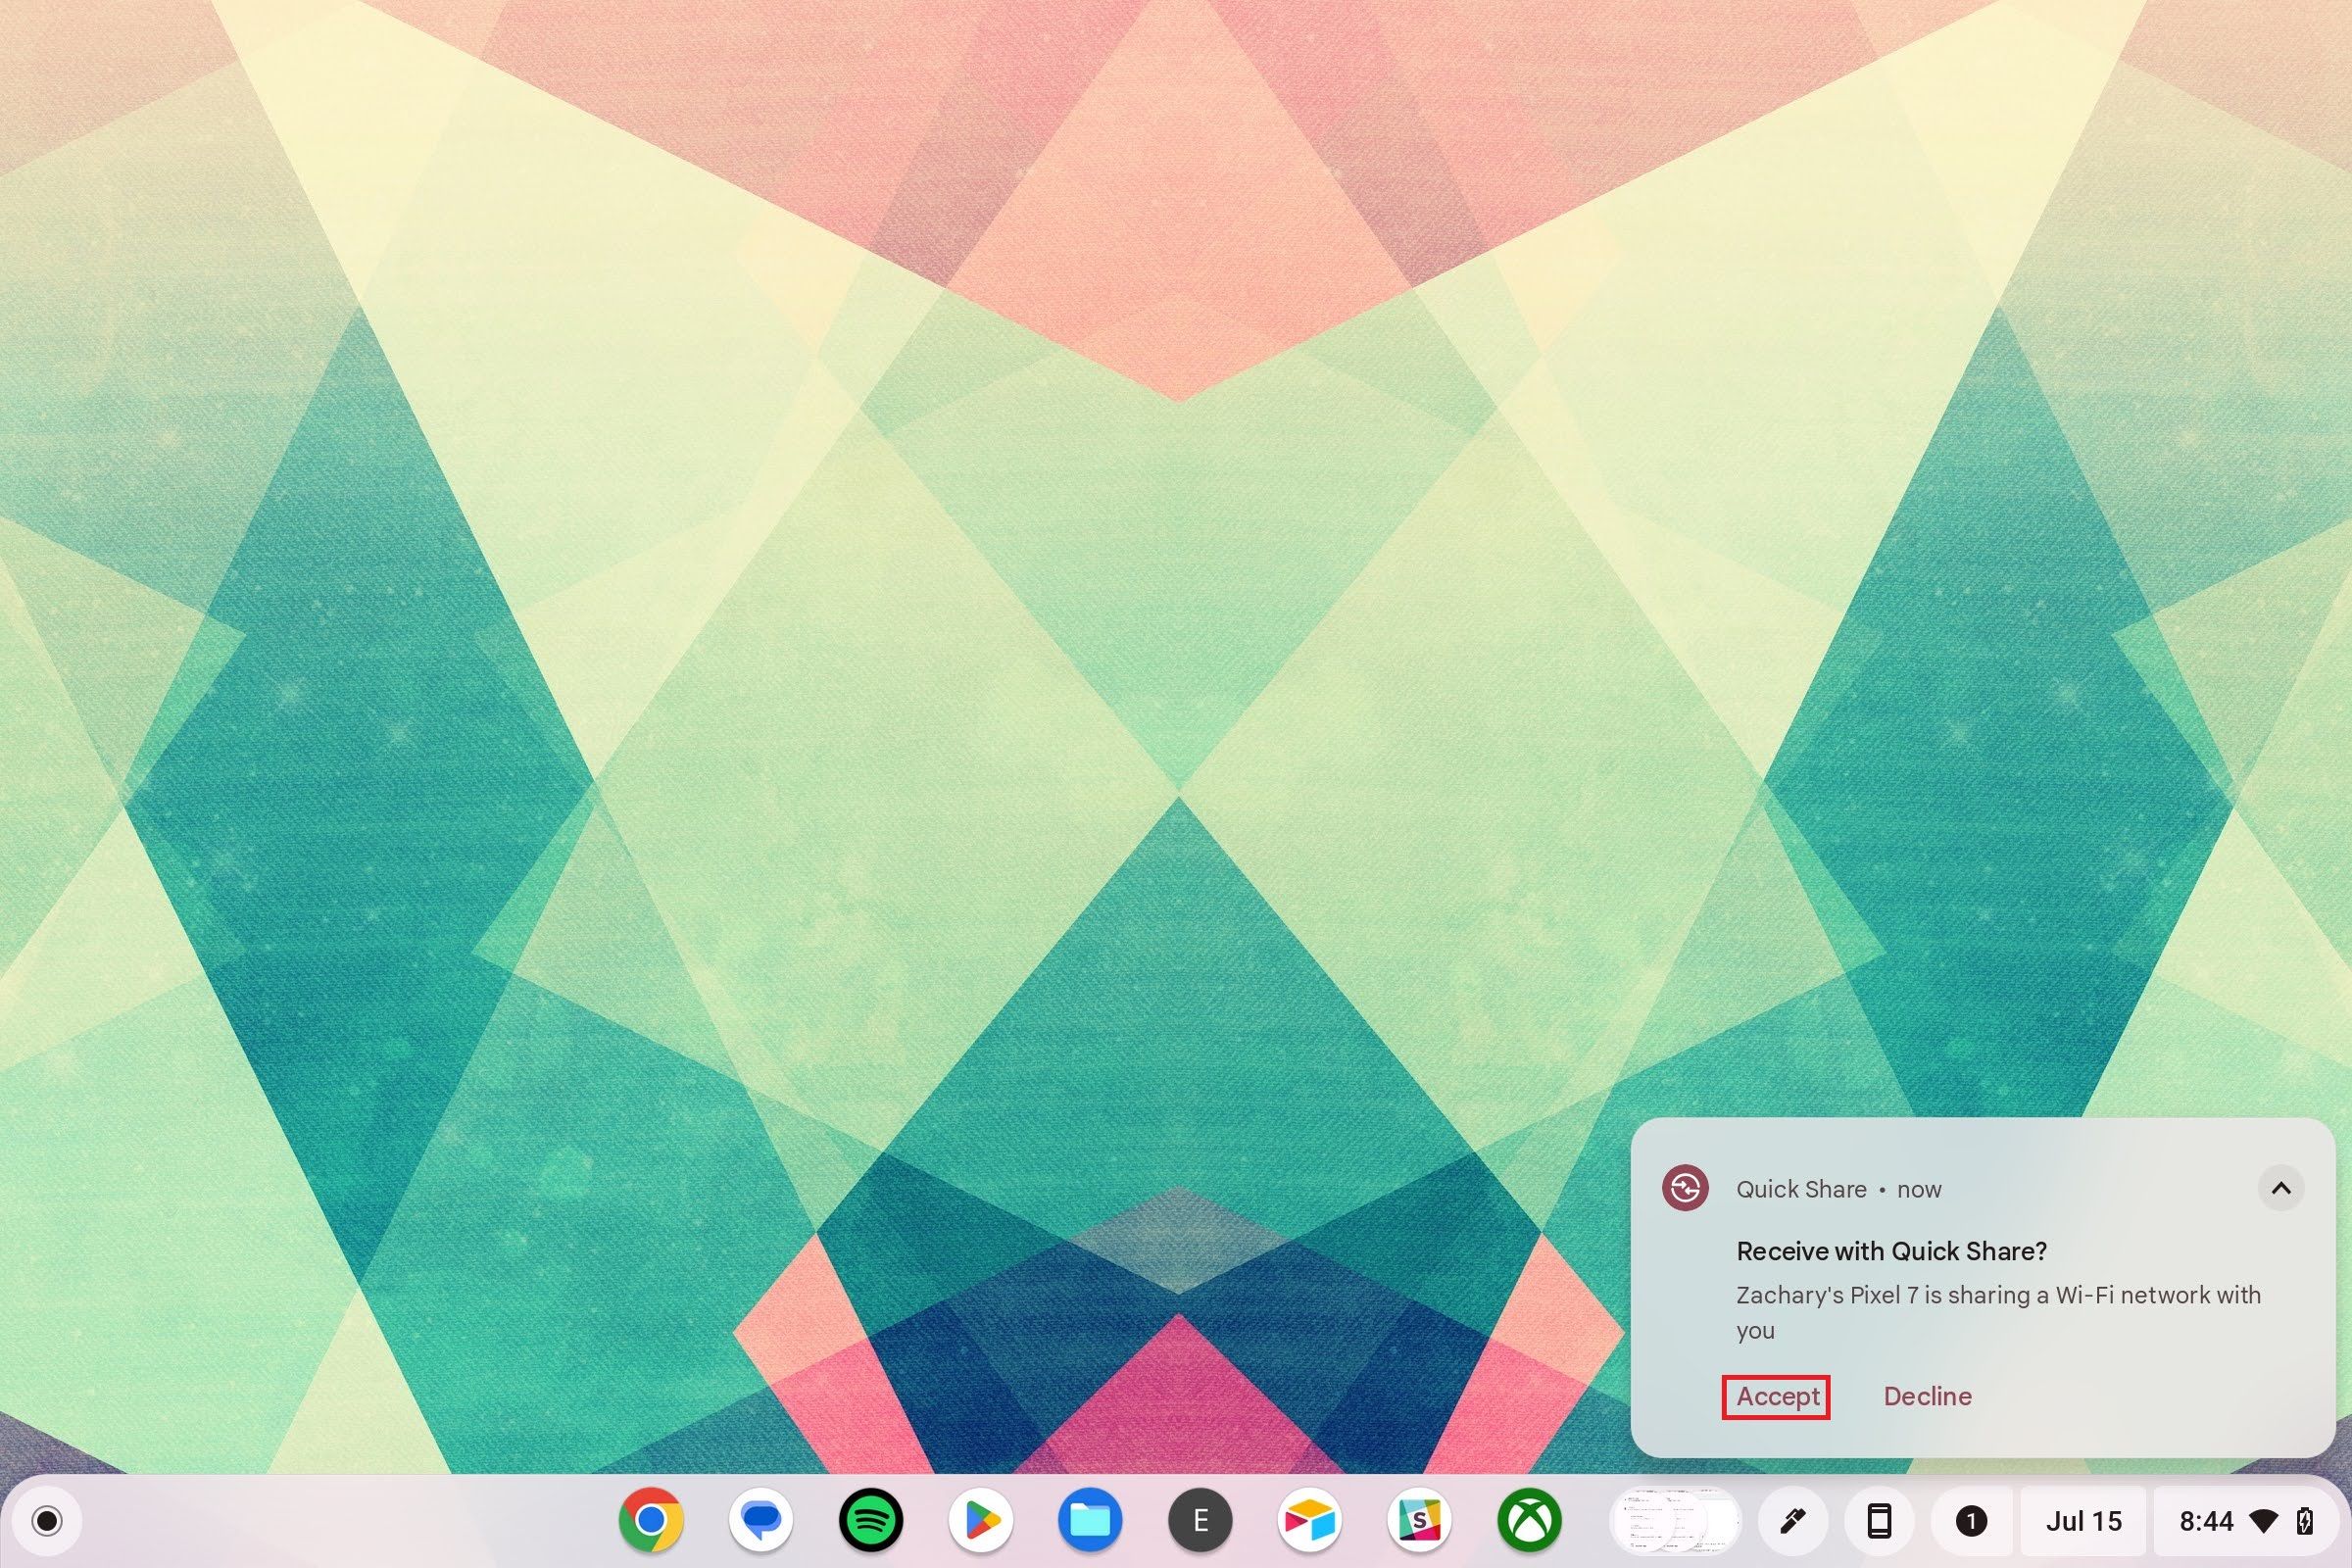
I hear many Apple users say how much they love Airdrop and how easy it is to transfer files between devices. Google has its version of Airdrop called Quick Share, which works as well. I like to activate Quick Share on all my devices so that I can transfer files between them when I need to.
To turn on Quick Share, open the Settings app and go to the Connected devices section. Next to Quick Share, tap the Set up button and follow the on-screen prompts to set up the feature. Now, you can easily share photos, PDFs, apps, and more between your devices.
Related
Become a Chromebook power user
Chromebooks are awesome because they’re simple yet powerful devices. I love the user experience, but adjusting the above settings takes it to the next level. If you want to become a Chromebook power user, try out these Chromebook tips and tricks.


